Lightweight Virtual Machine Hadoop Distributed File System Deployment
If you just want to experiment with the Hadoop Distributed File System (HDFS), there is no need to set it up permanently on your local machine. Furthermore, if Windows is your primary operating system, you do not have to install Linux on your machine in order to give HDFS a try.
You can set up HDFS on a virtual machine and interact with it through your local operating system. Nevertheless, running a virtual machine can be very frustrating if you don't have a large amount of memory. Therefore, in this tutorial we are going to use a light weight operating system for the virtual machine: Arch Linux.
Prerequisites:
- Download and install VirtualBox for your host machine.
- Download Arch Linux: use any of the HTTP direct download links to download the "archlinux-****.iso" file.
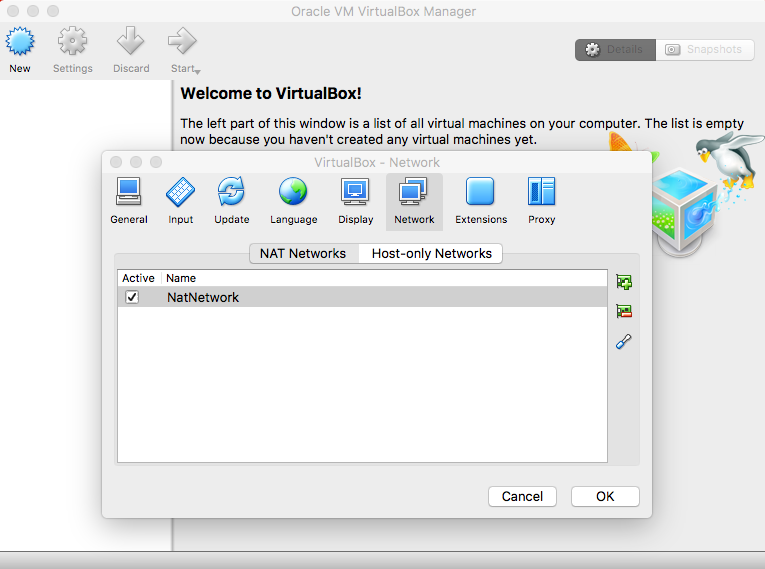
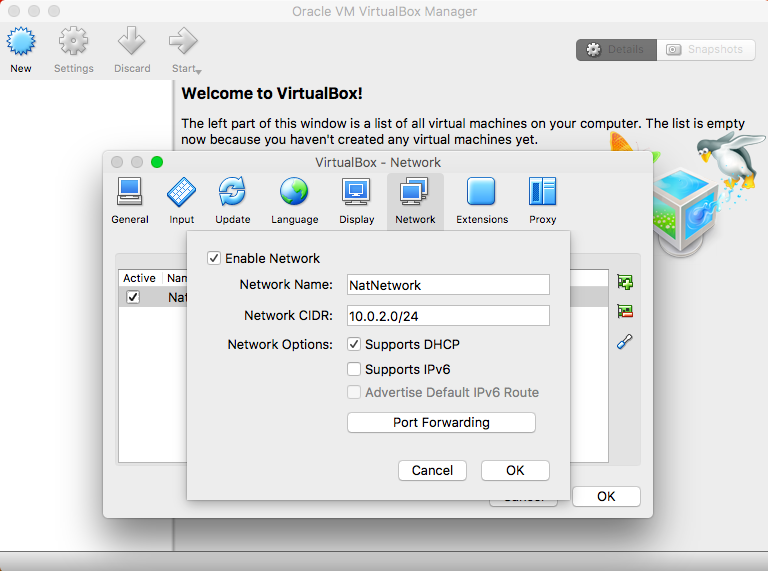
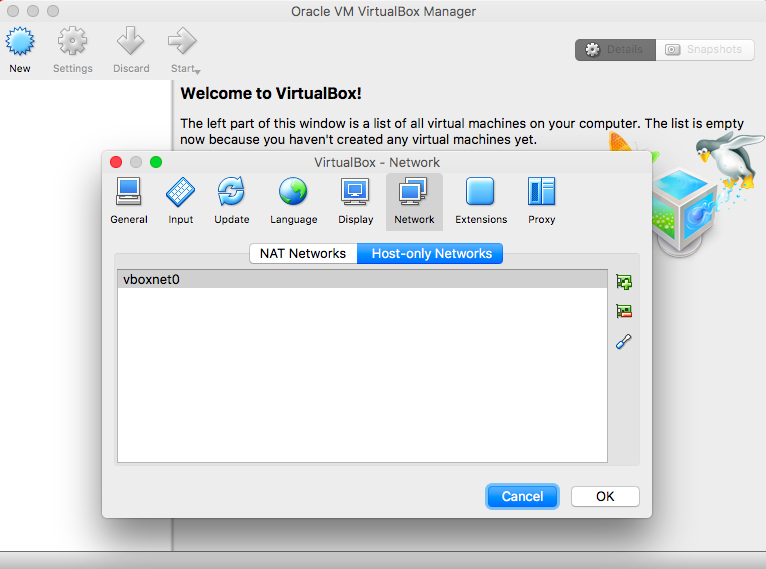
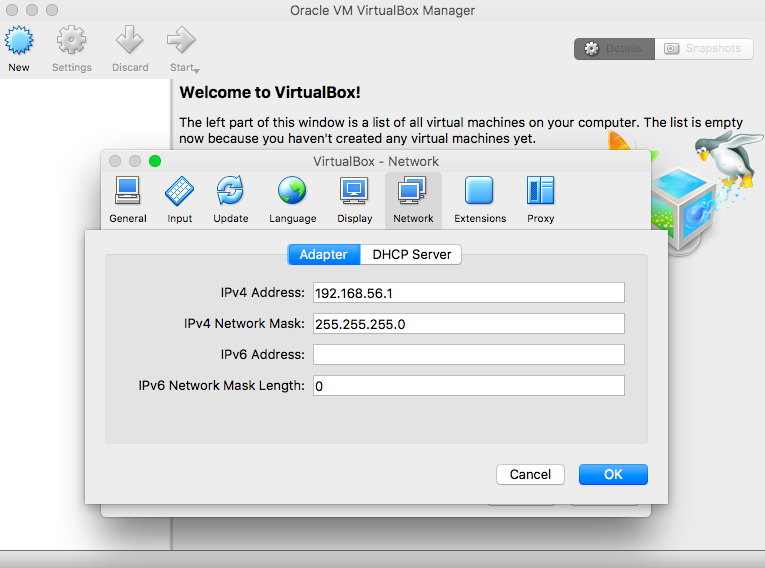
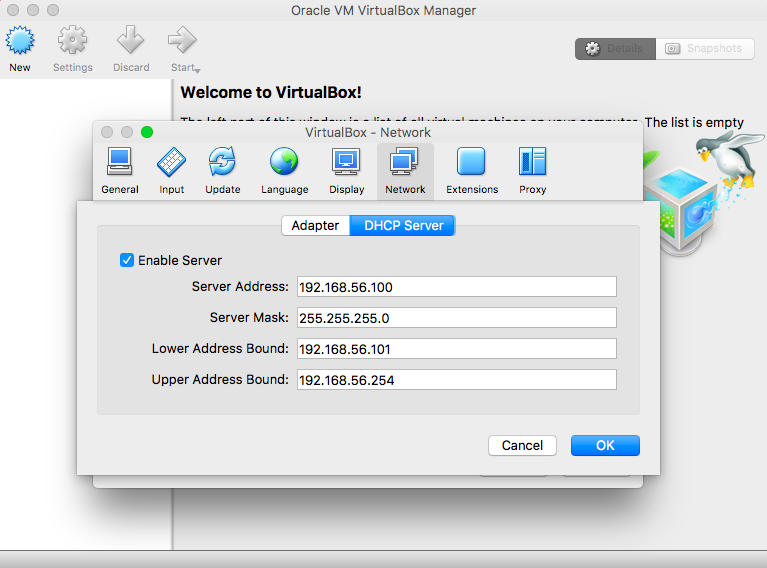
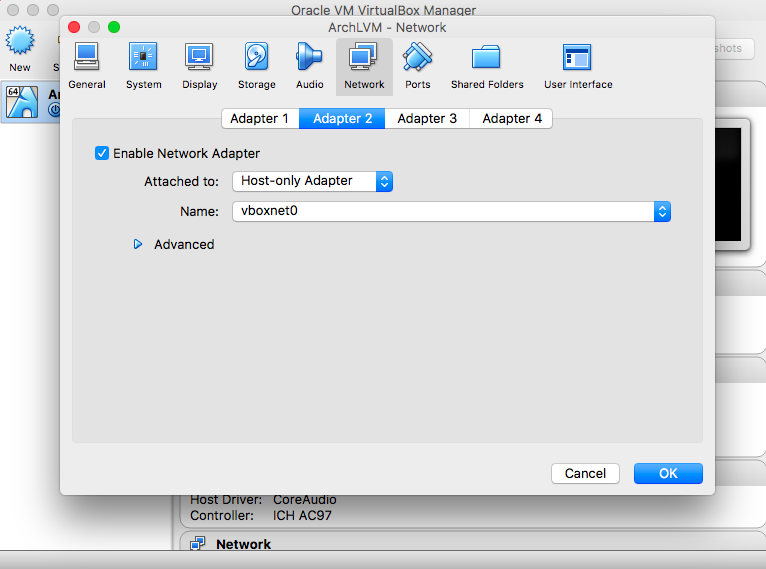
Add networking interfaces from the general network preferences:
- NAT Networks
|
|
- Host-only Networks
|
|
|
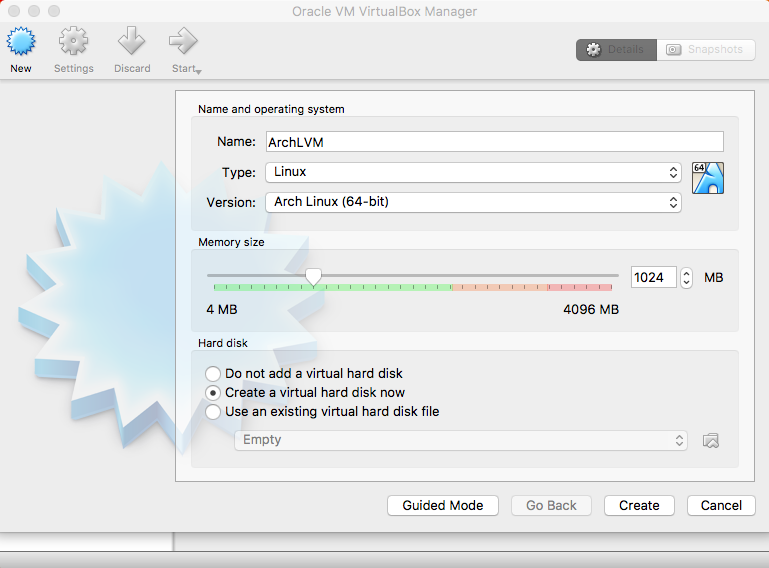
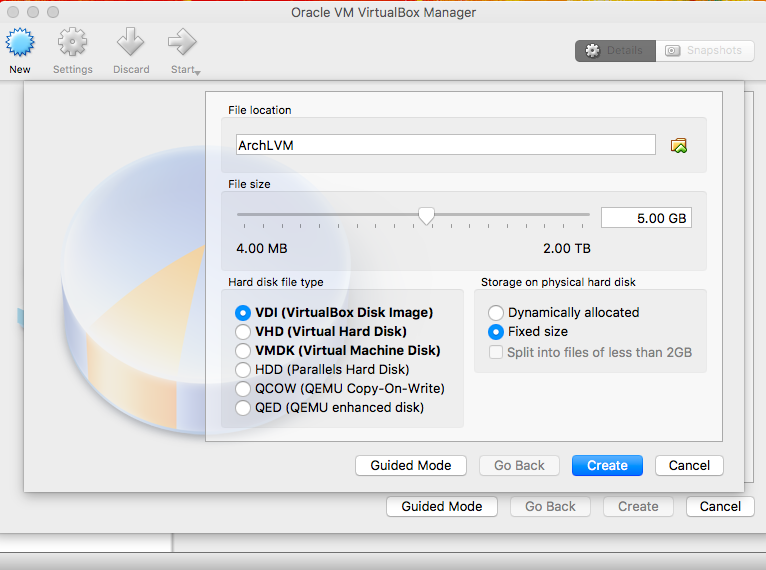
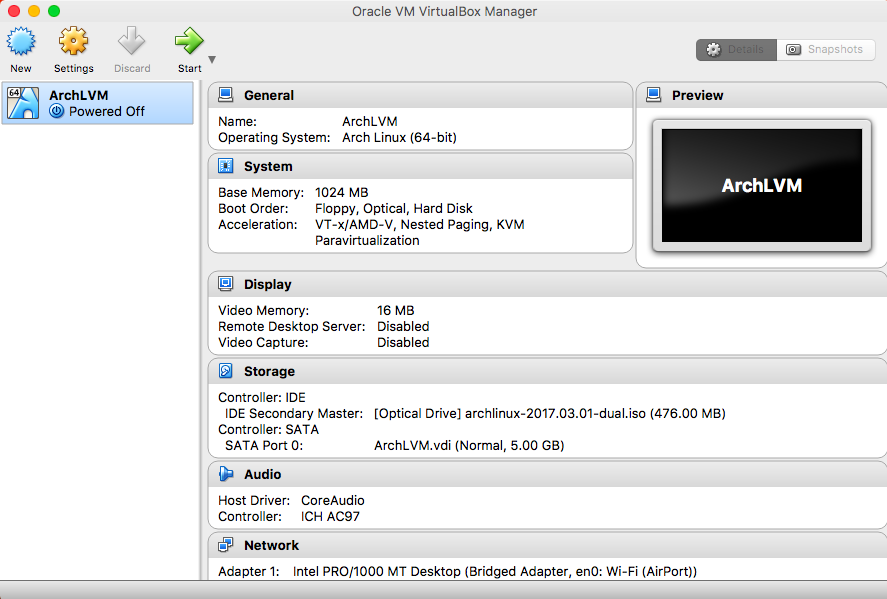
Create a new virtual machine and set up the operating system and memory:
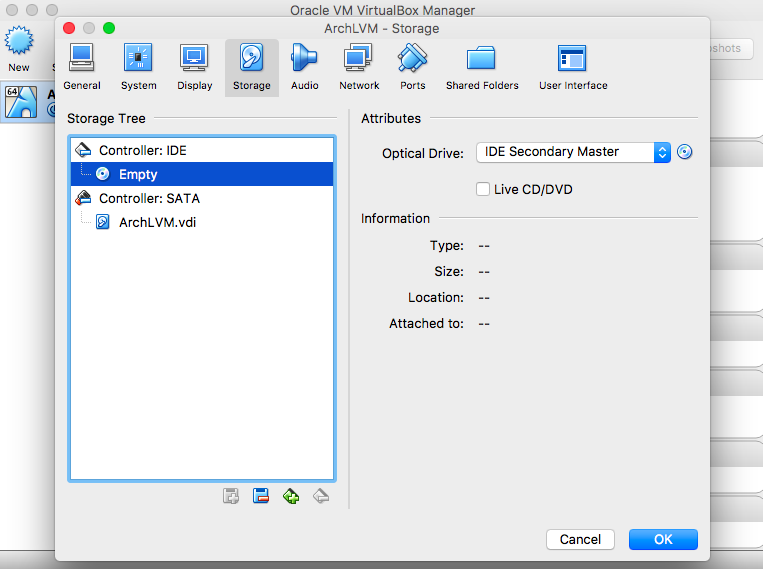
Click on Settings to set up the created VM instance:
|
|
- Storage
|
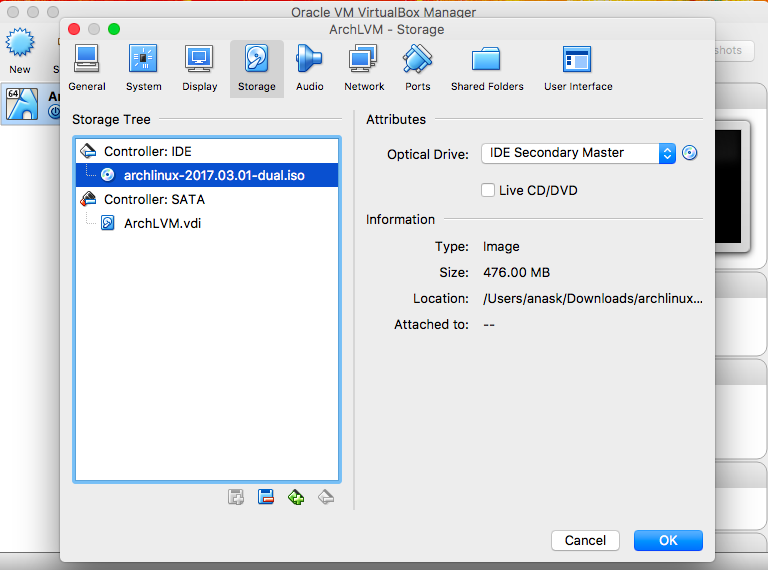
|
- Network
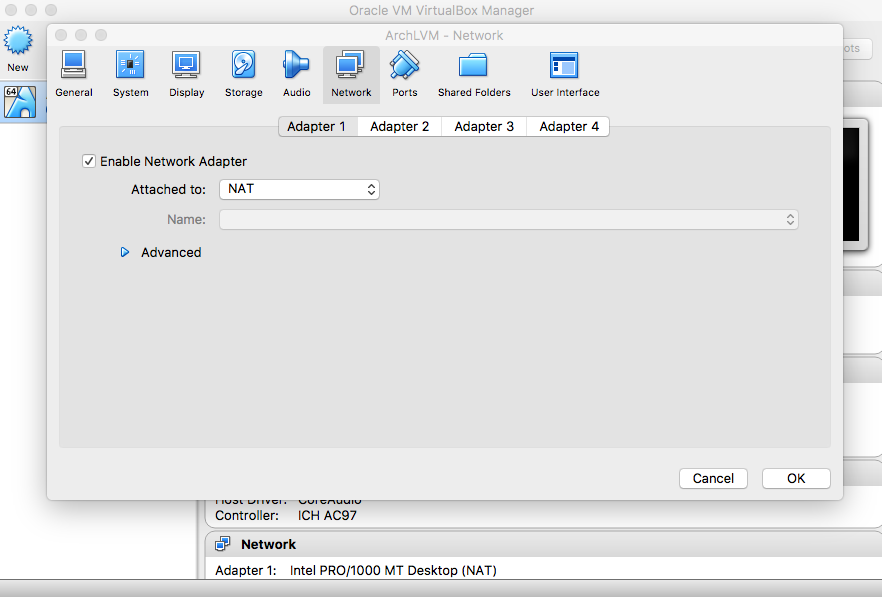
|
|
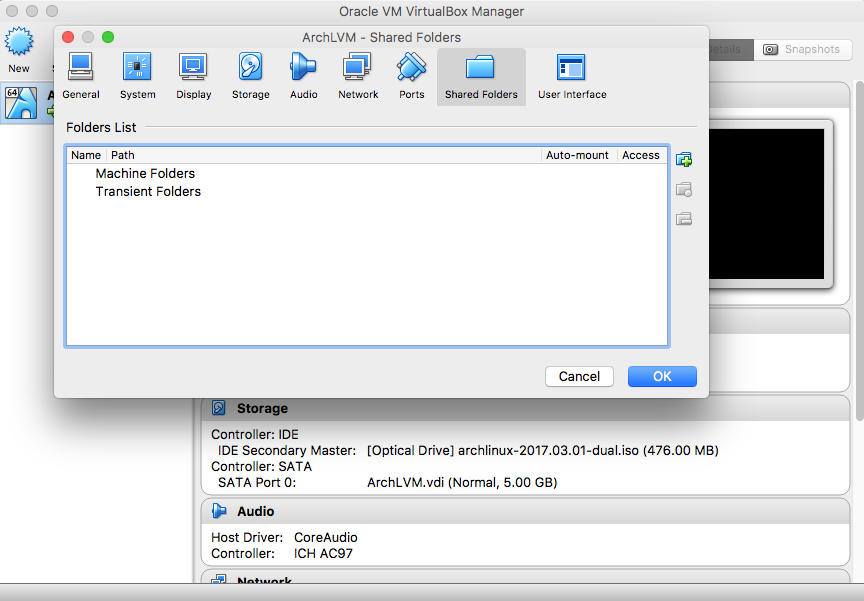
- Shared Folders (optional but preferred)
|
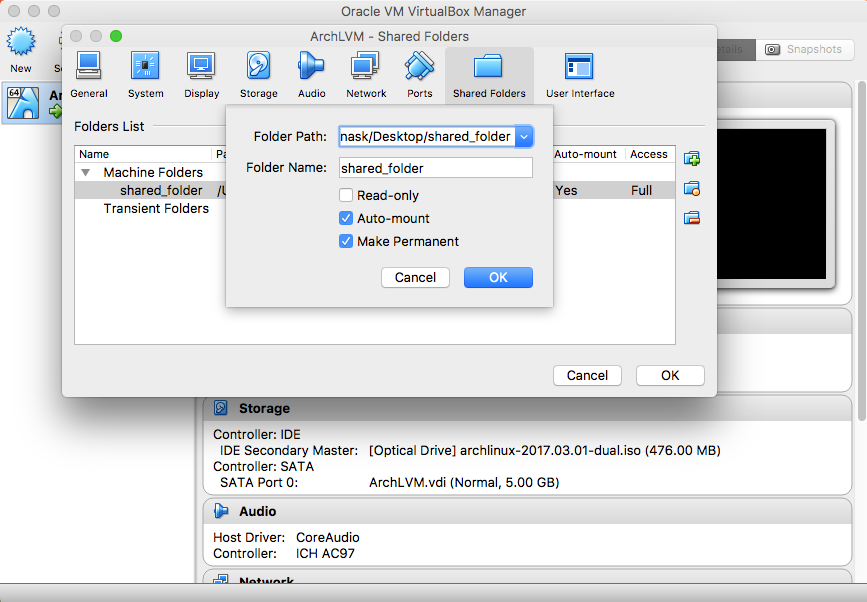
|
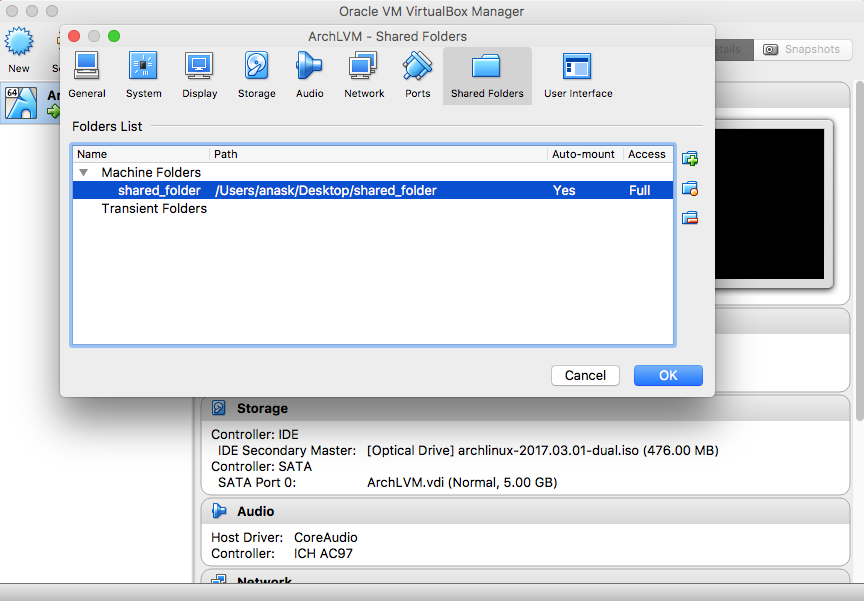
|
The following section is based on David Goguen's tutorial:
How to Install Arch Linux
I suggest that you watch the whole video ('speeded playback') first, then continue with this tutorial. There is only a slight variation in some steps.
I suggest that you watch the whole video ('speeded playback') first, then continue with this tutorial. There is only a slight variation in some steps.
Install the operating system on the virtual hard disk:
|

|
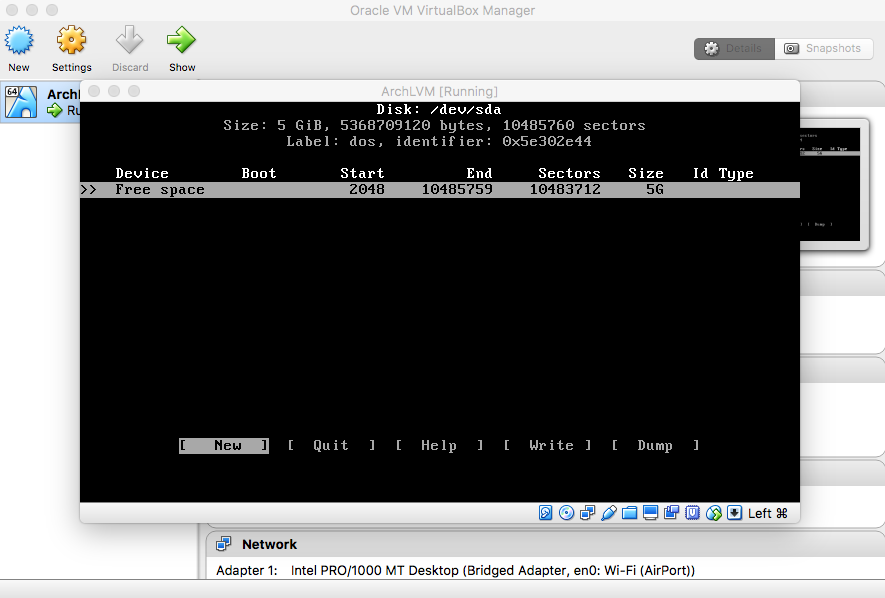
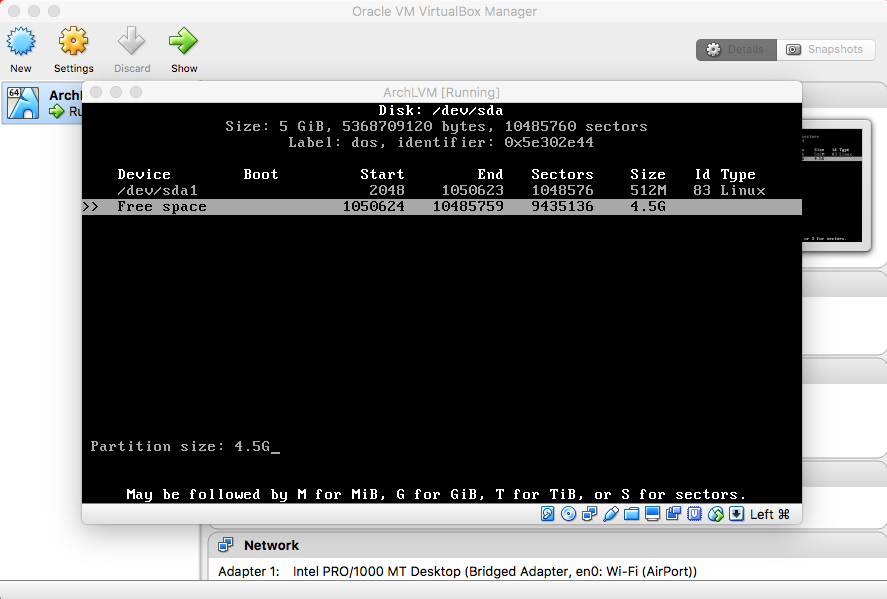
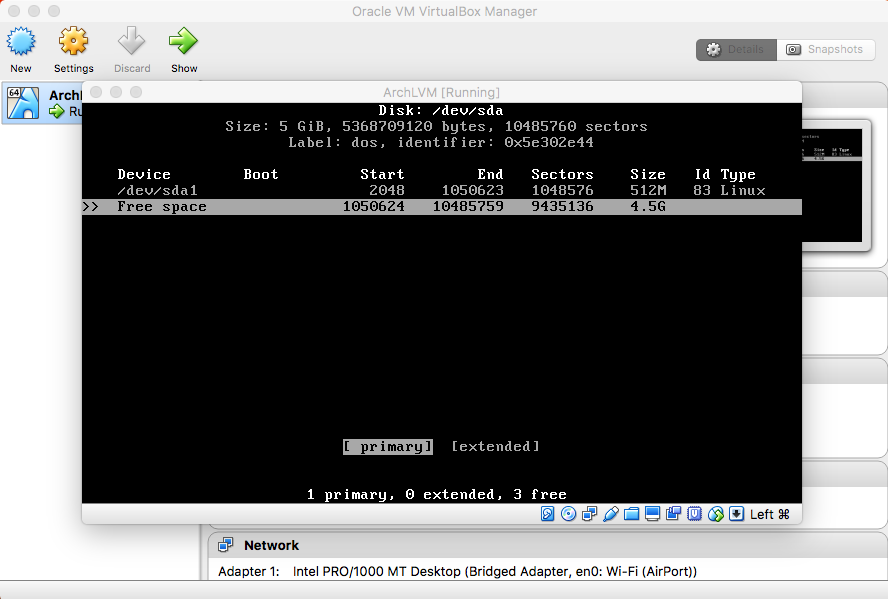
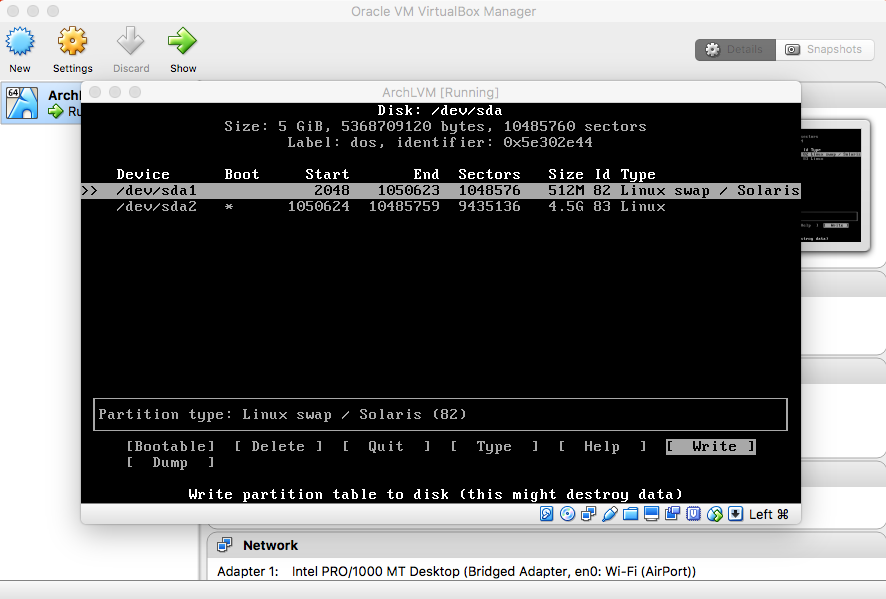
Partition the /dev/sda Hard Disk:

|
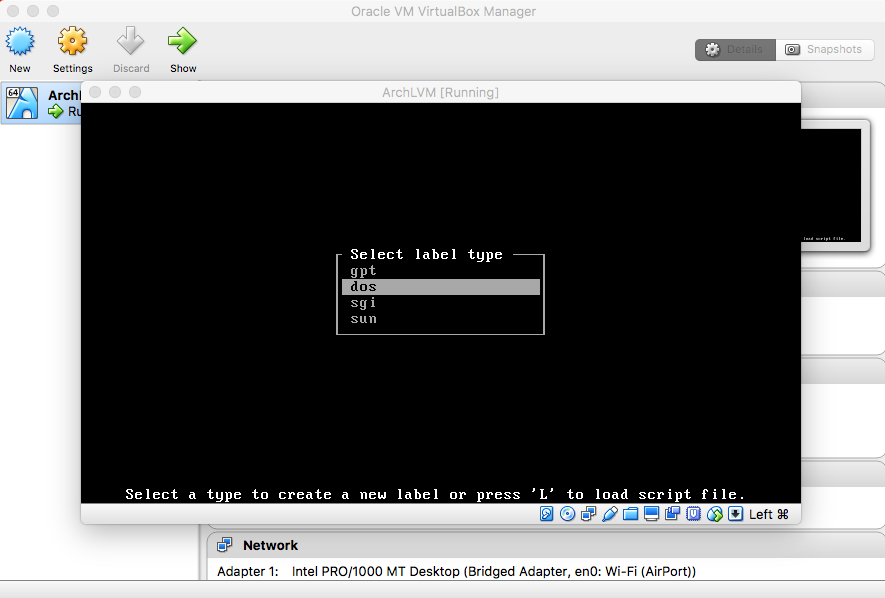
|
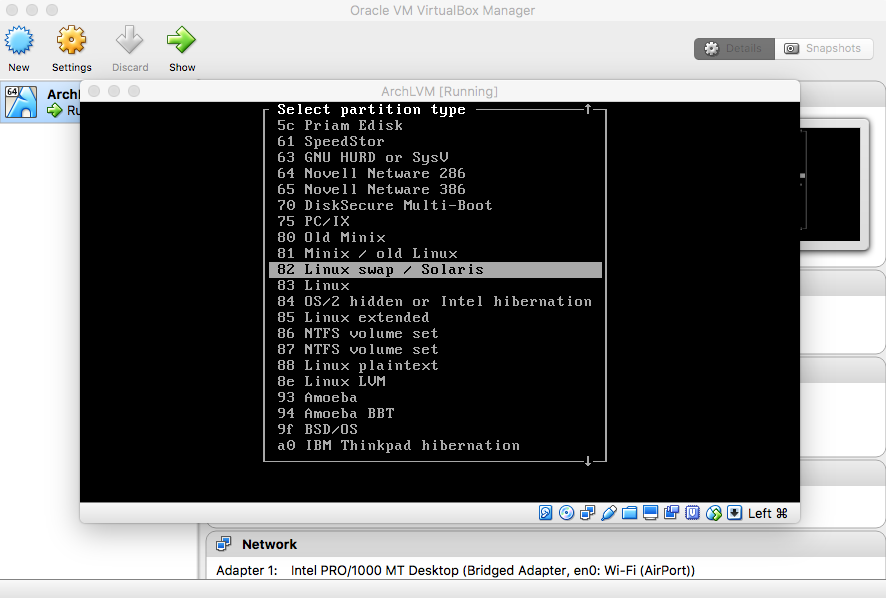
- Swap Partition
|
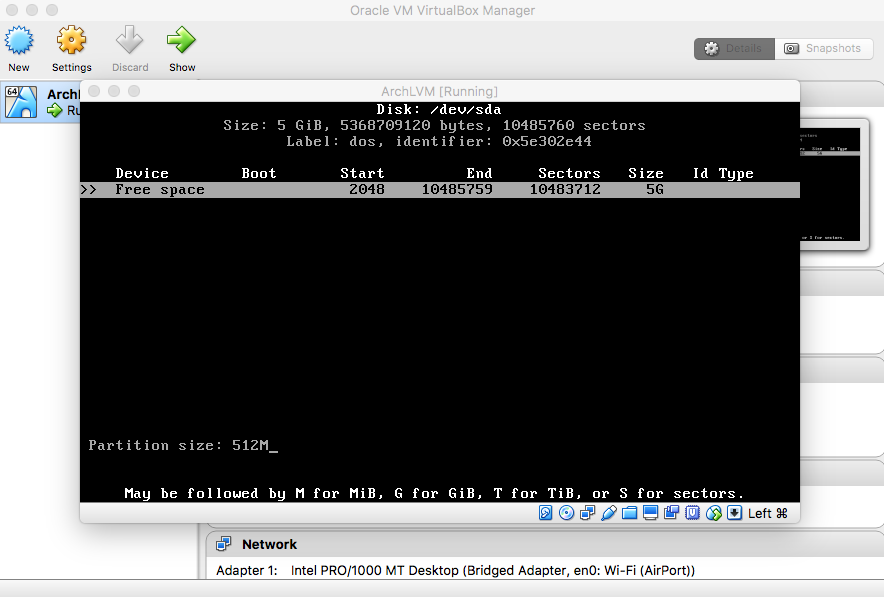
|
|
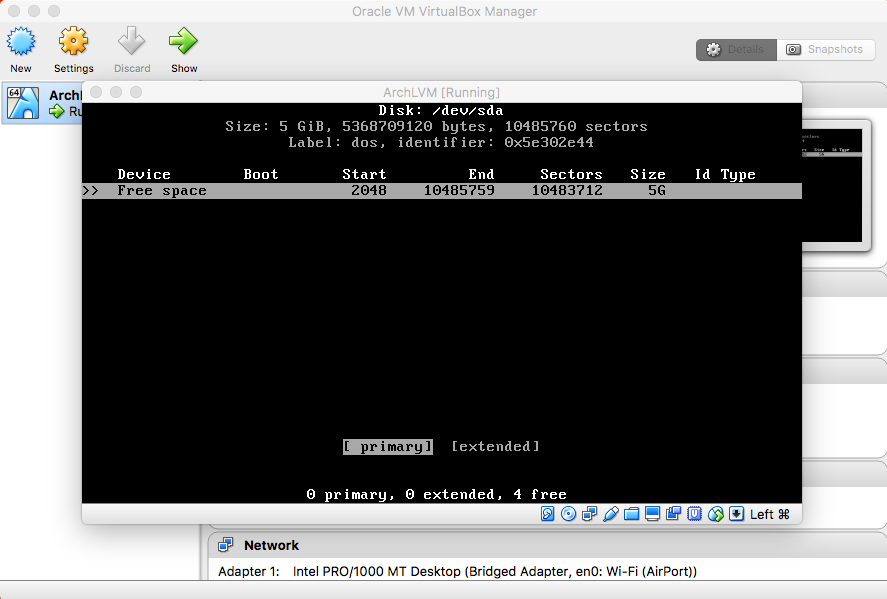
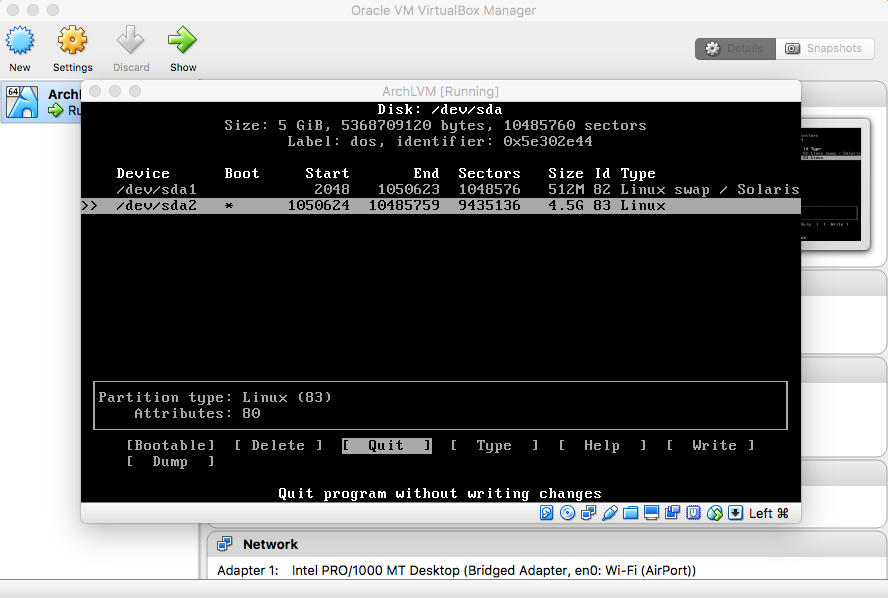
- Root Partition
|
|
|
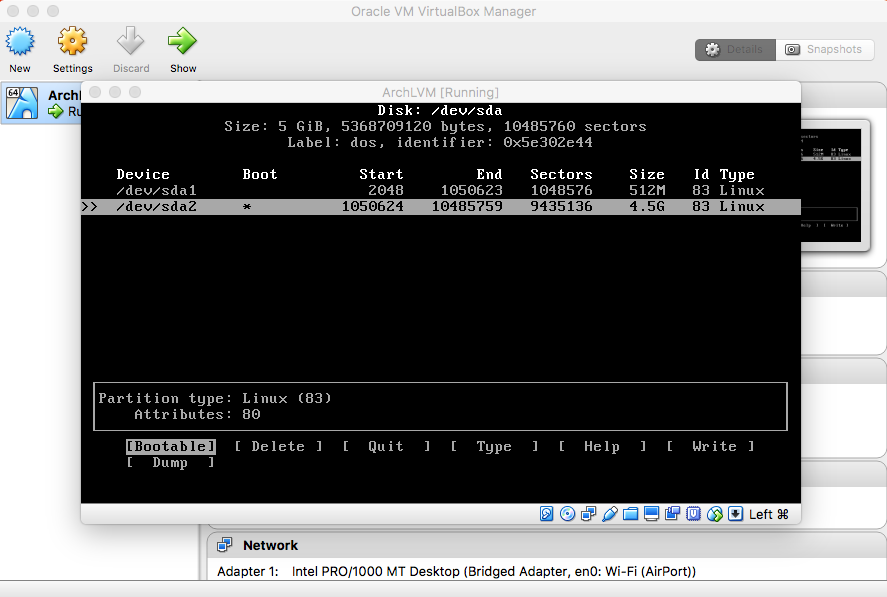
|
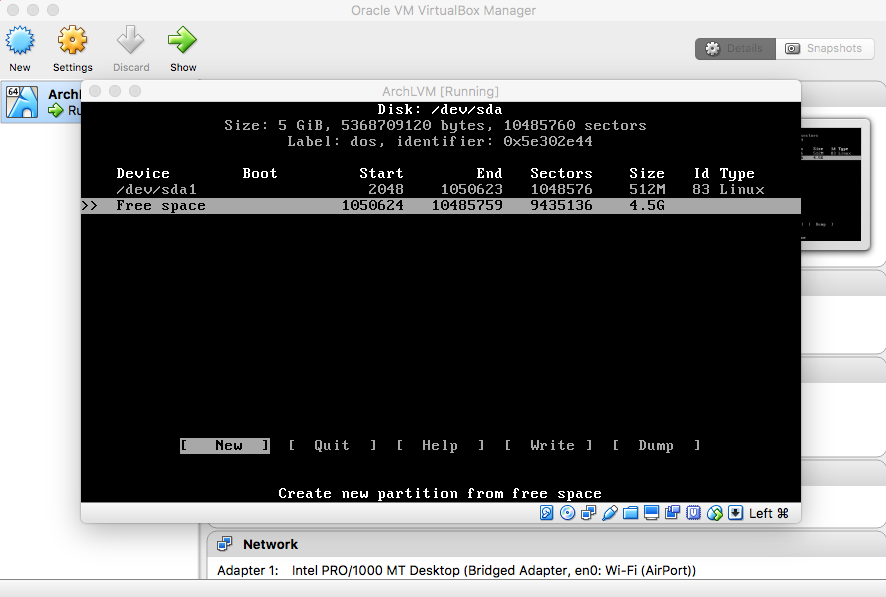
- Swap Partition Type
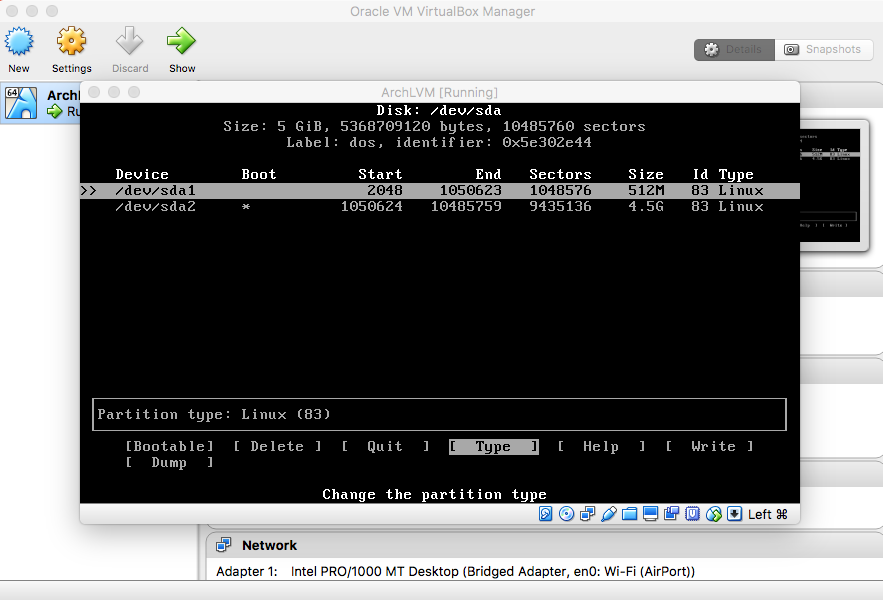
|
|
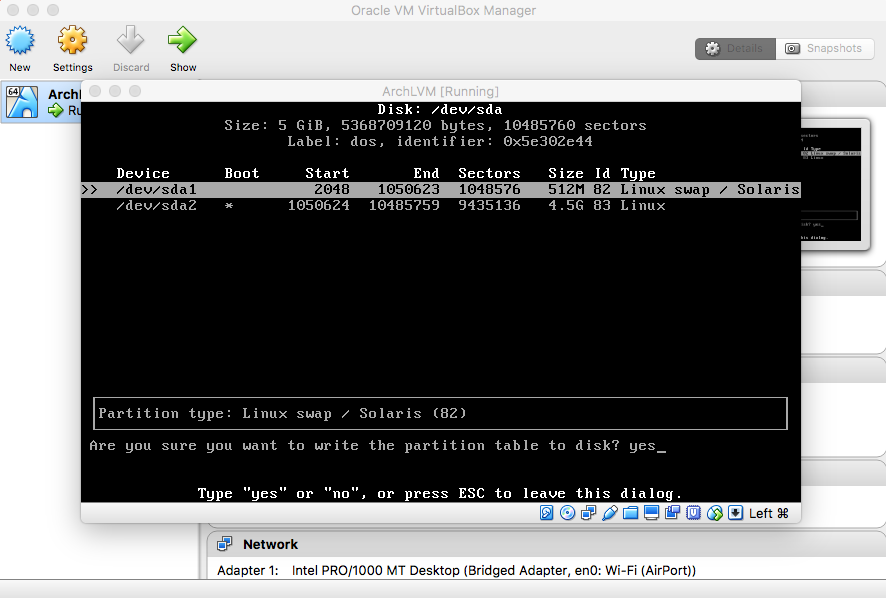
- Save Created Partitions
|
|
|
- Format and Mount Root Partition
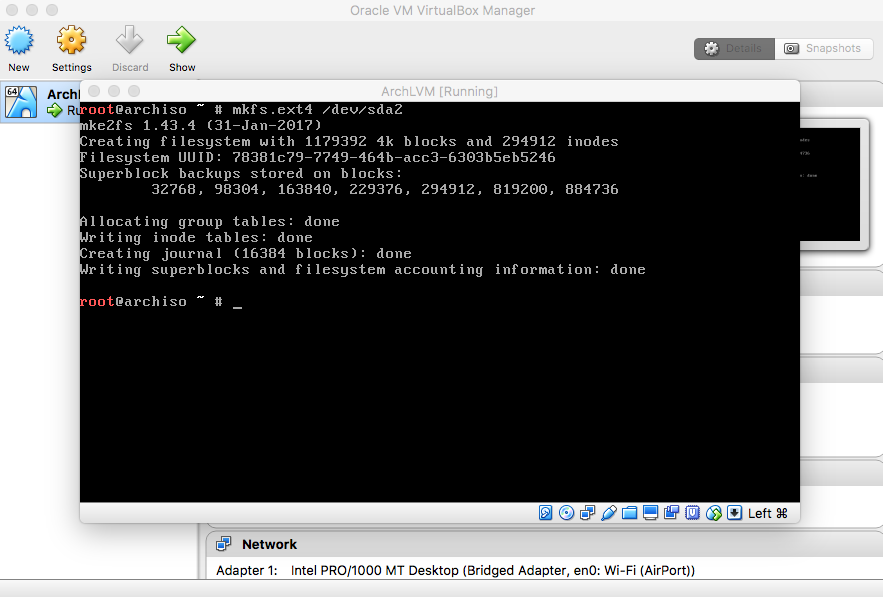
|

|
- Make and Enable Swap Area on Swap Partition
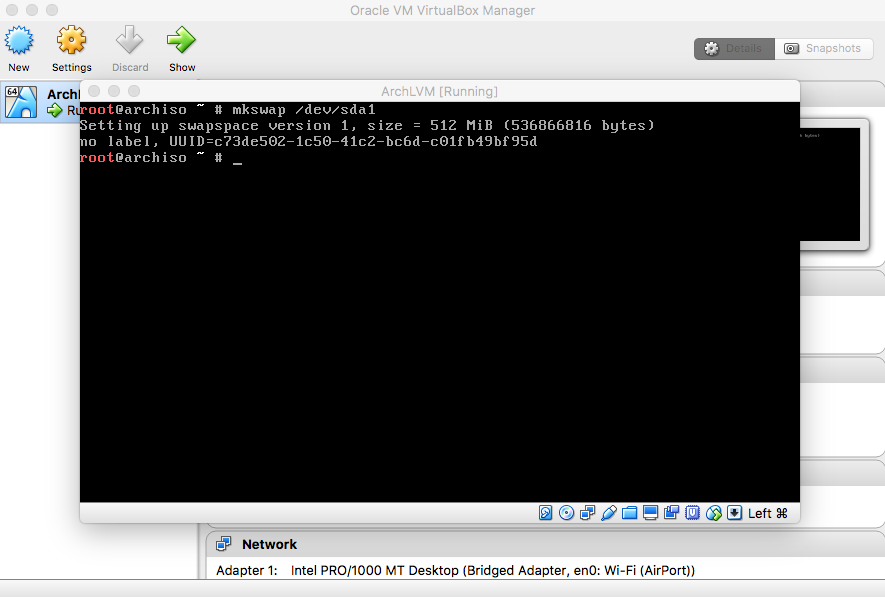
|

|
- Install OS on Root Partition

|
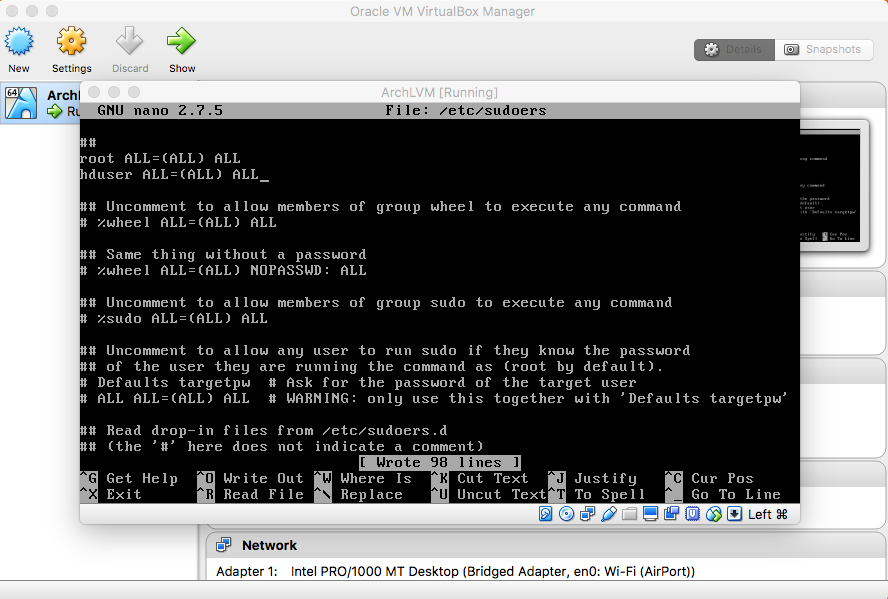
- Configure OS
- Users

(Optional) Type "passwd" and press enter. Enter a password. |
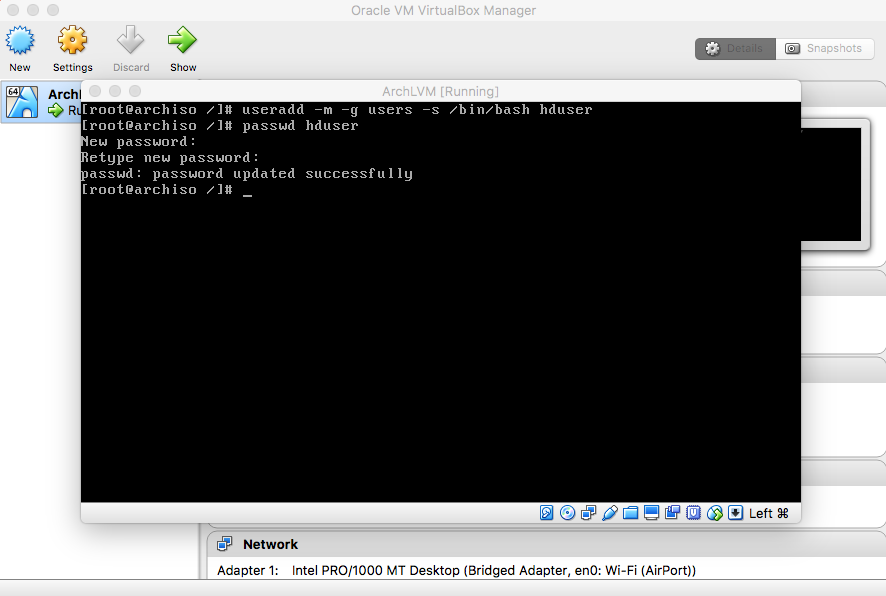
Type "passwd hduser" and press enter. Enter a password. |

|
|
- Language
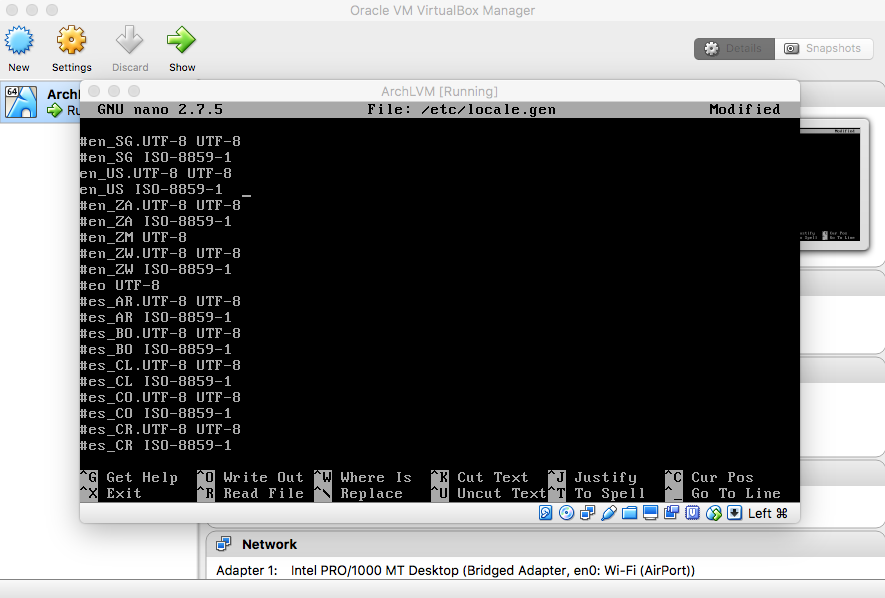
|
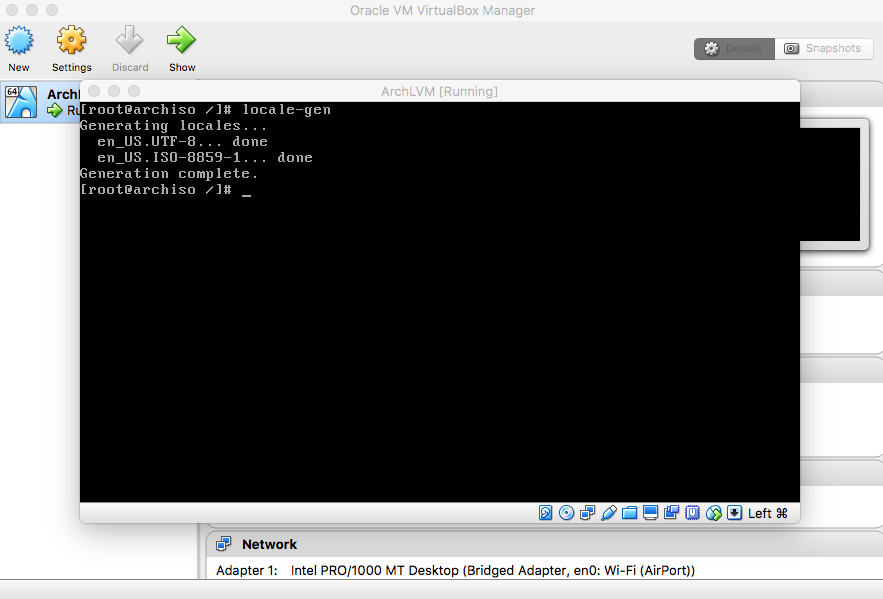
|
- Time Zone
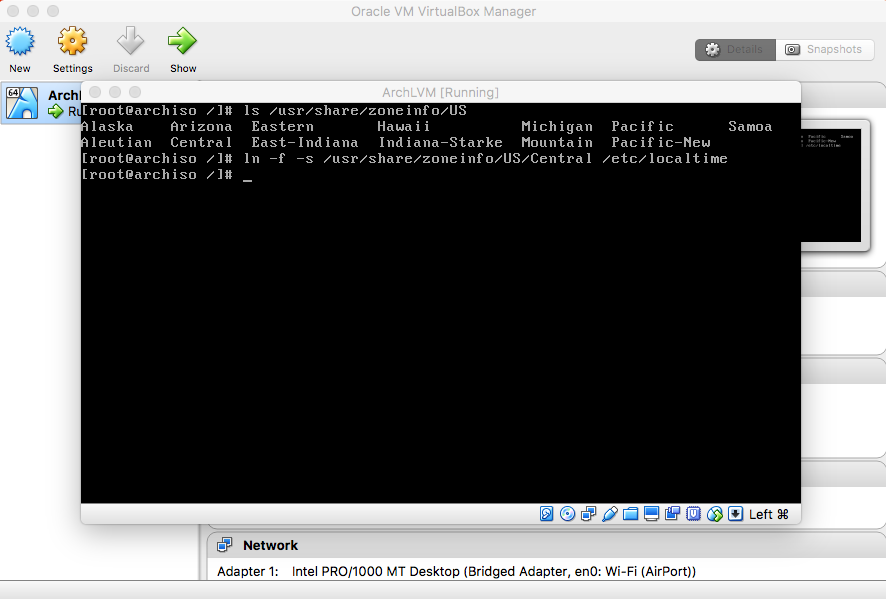
and press enter. (You can replace US/Central with your timezone.) |
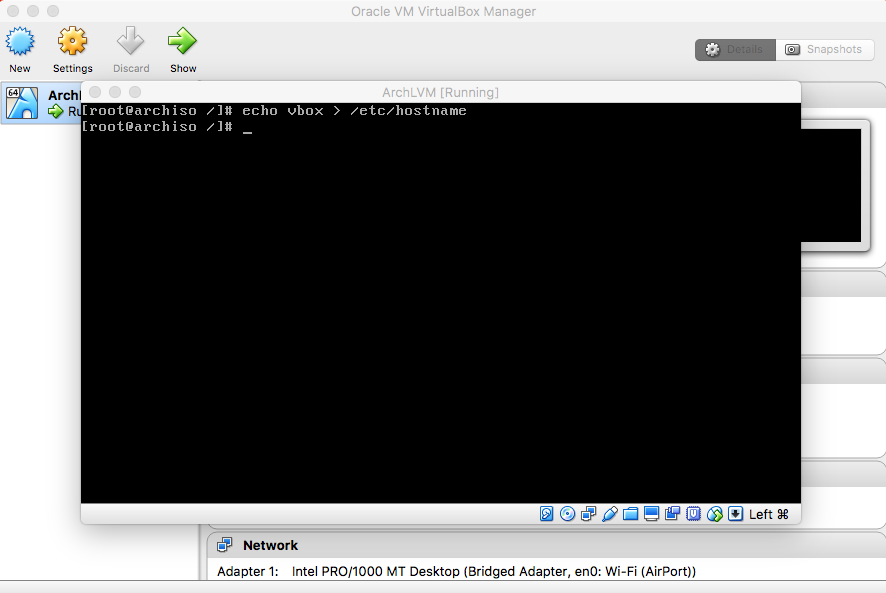
- Hostname
|
- Bootloader

|
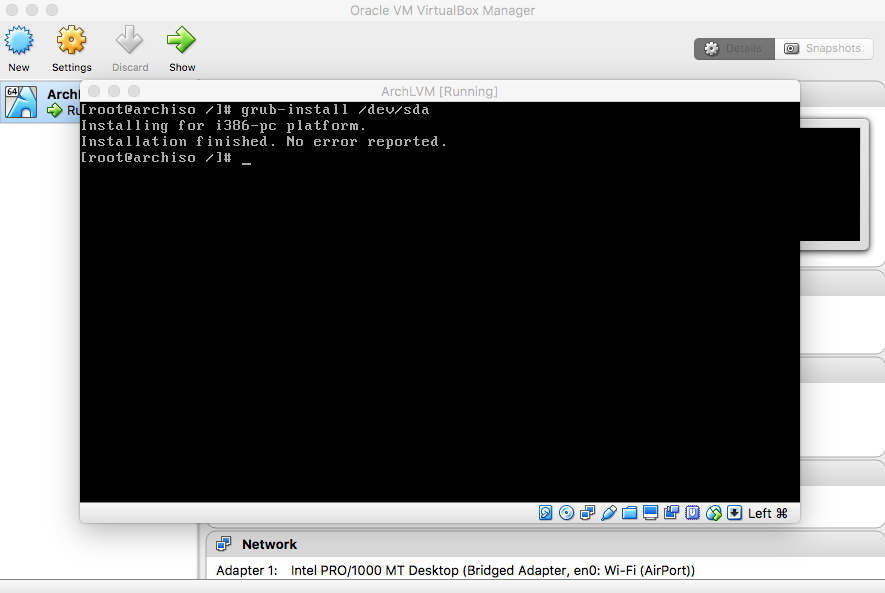
|
|

|
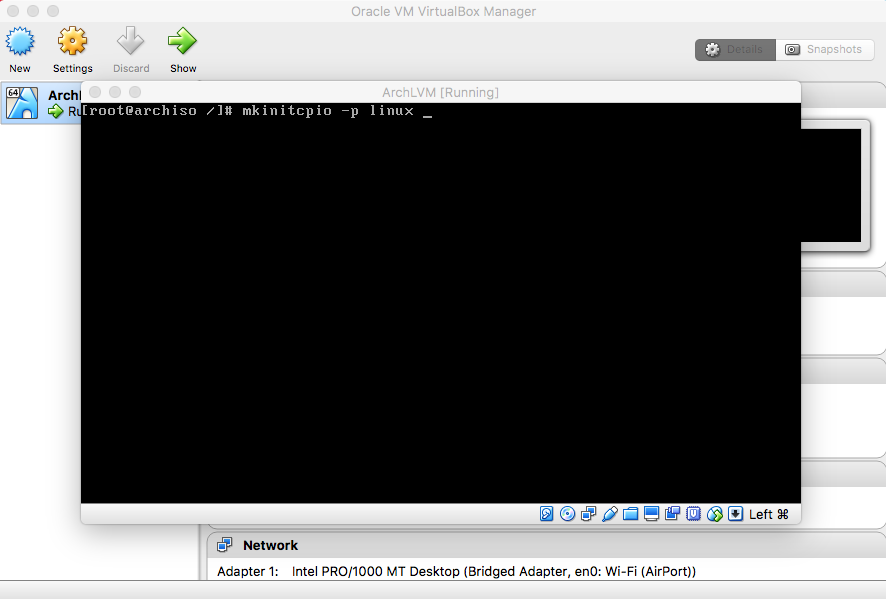
- FSTAB

|

|

Type "shutdown now" and press enter. |
- Boot Order
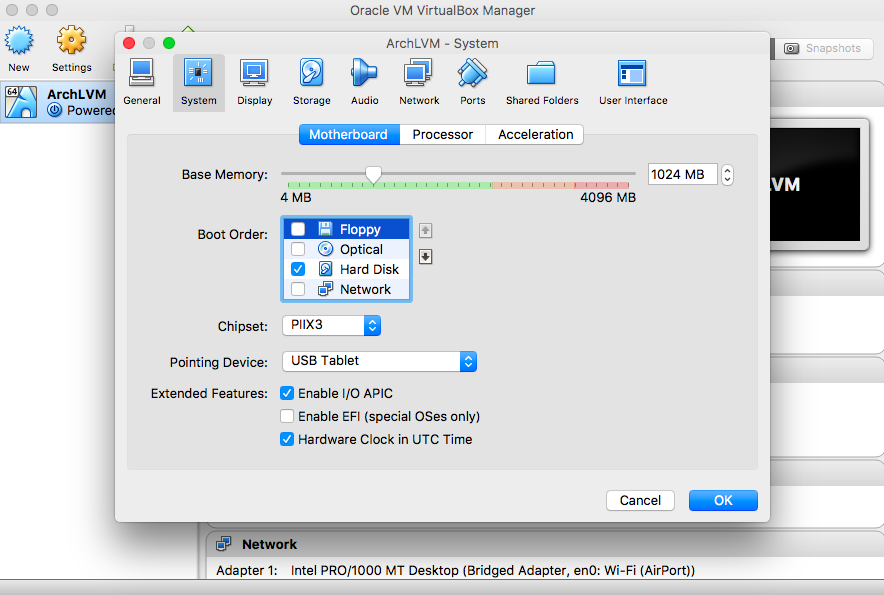
Click on "System" and uncheck "Floppy" and "Optical" from the "Motherboard" : "Boot Order". Then click "OK". |
- Login
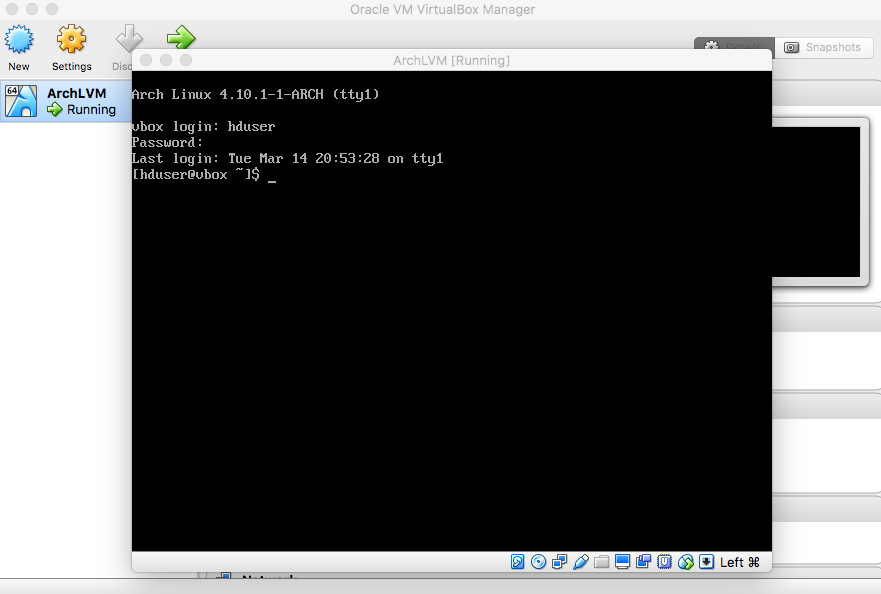
Log in with the "hduser" username and its password. |
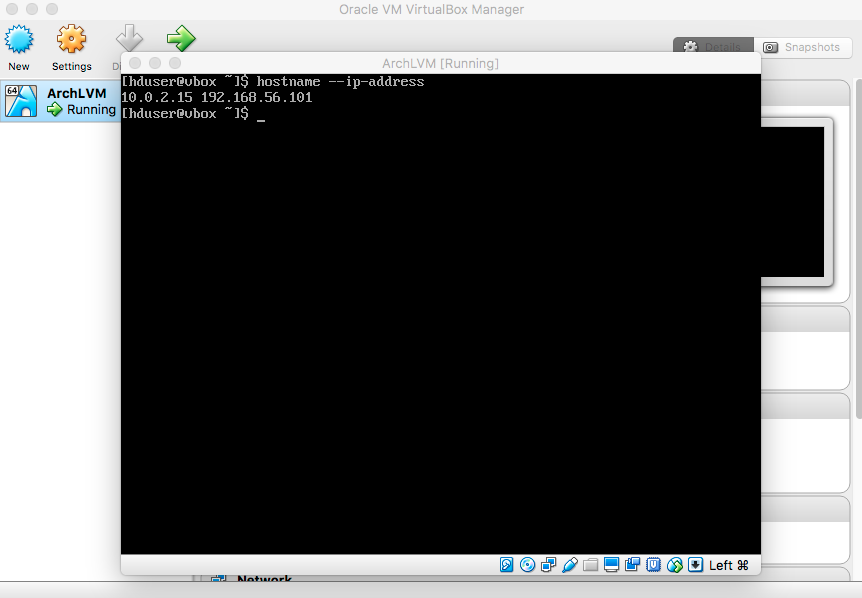
- Internet
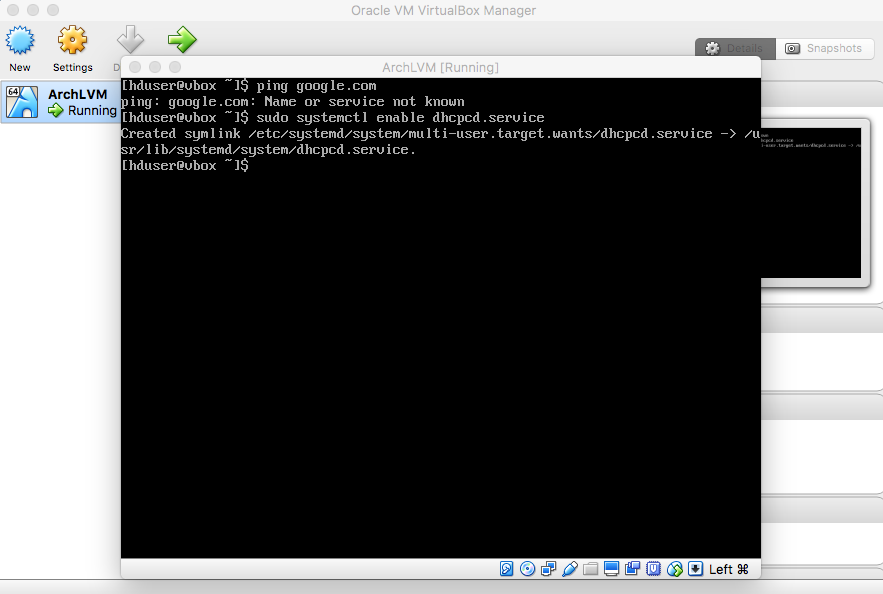
|
Therefore, type "sudo systemctl enable dhcpcd.service" and press enter. Next, type "sudo systemctl start dhcpcd.service" and press enter enter. |
- Refresh Packages
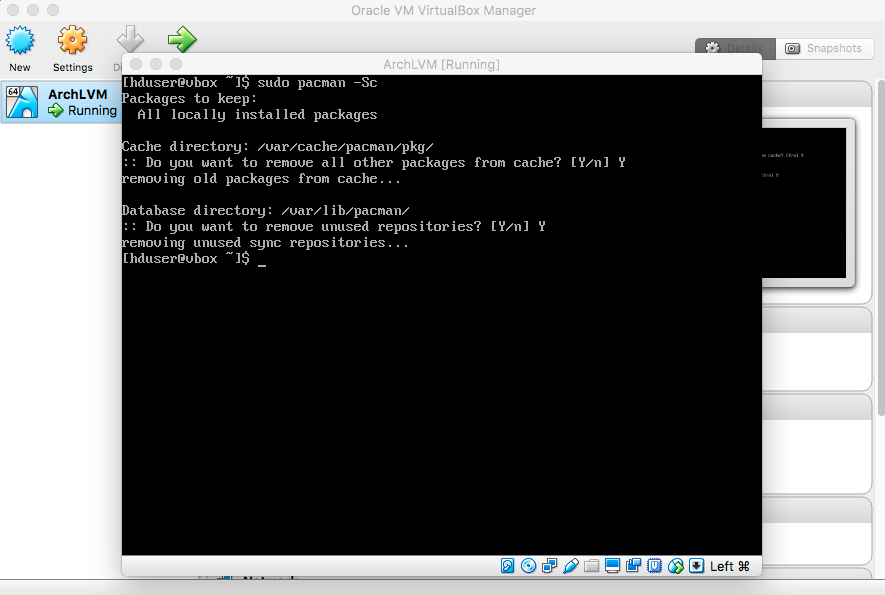
|
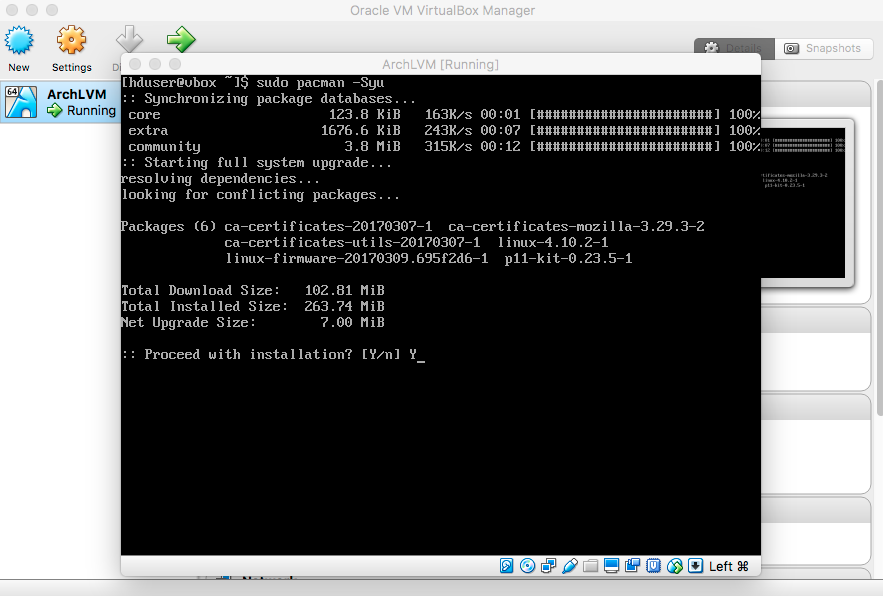
|
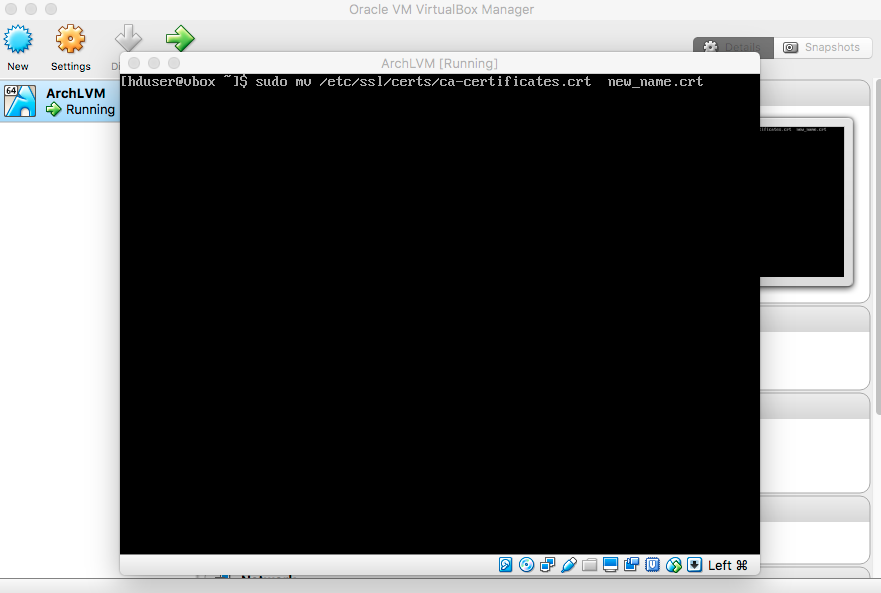
(conflicting files)" error, rename (or delete) the file that is causing the error. For example: type "sudo mv /etc/ssl/certs/ca-certificates.crt new.crt" and press enter then re-execute the previous command. |
- SSH
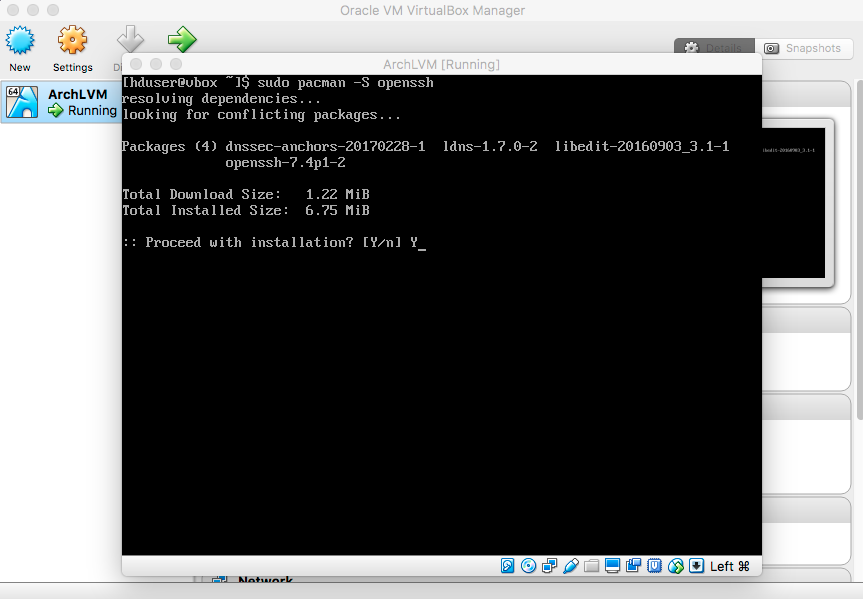
|
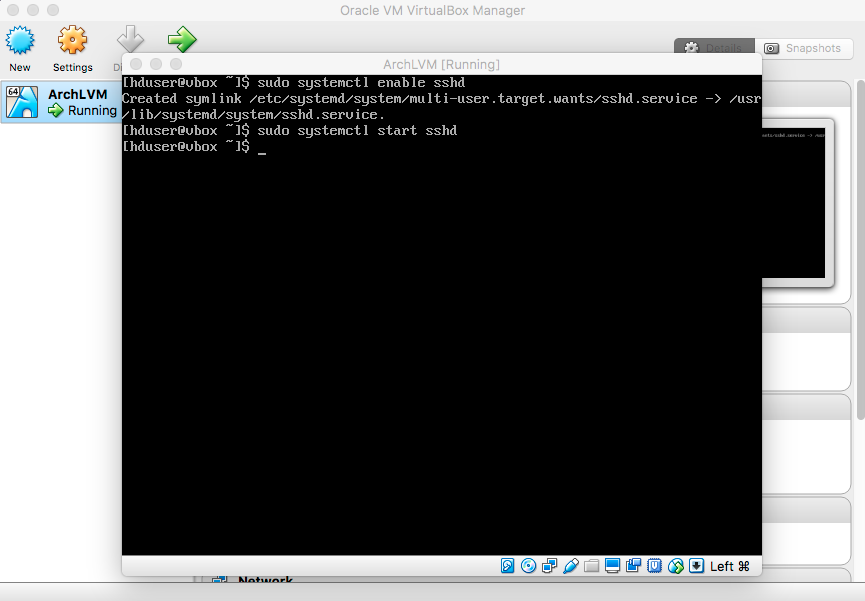
|
|
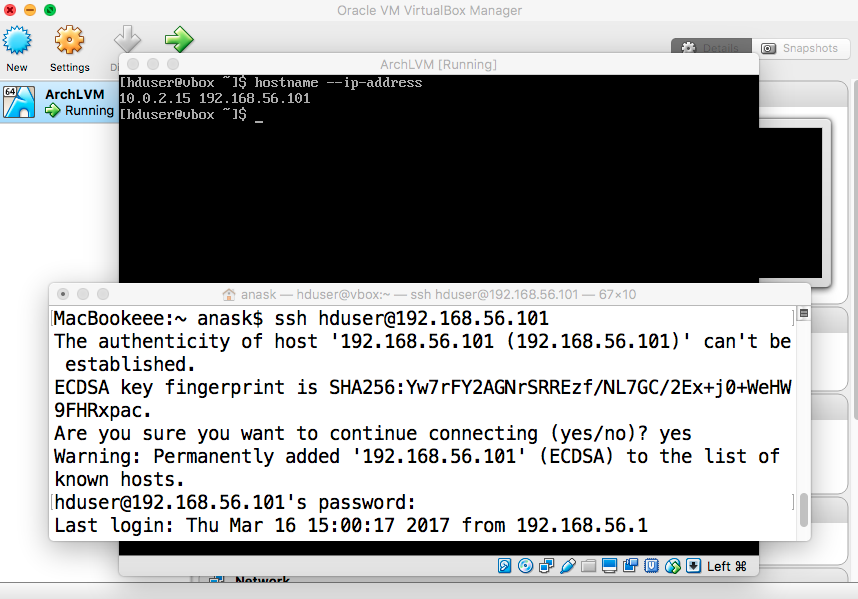
|
- Headers and Guest Additions

|
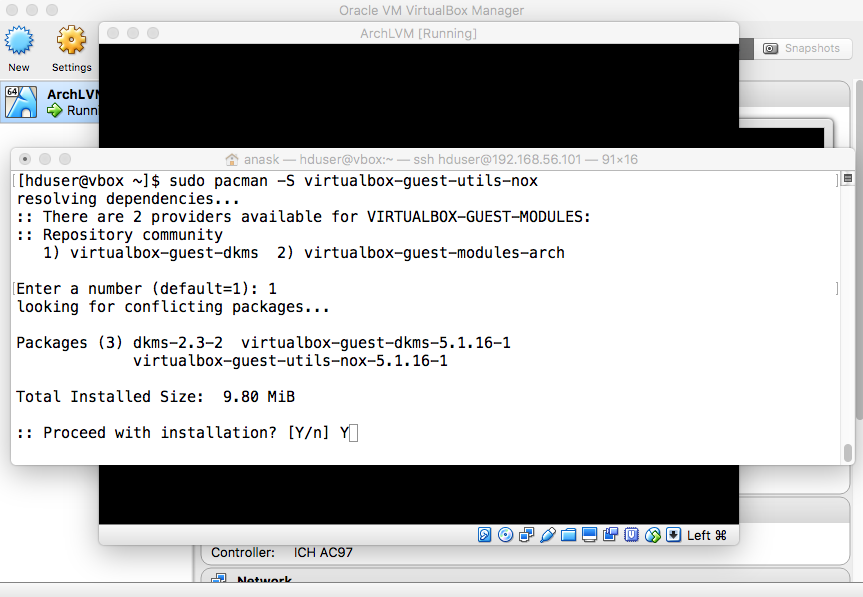
|
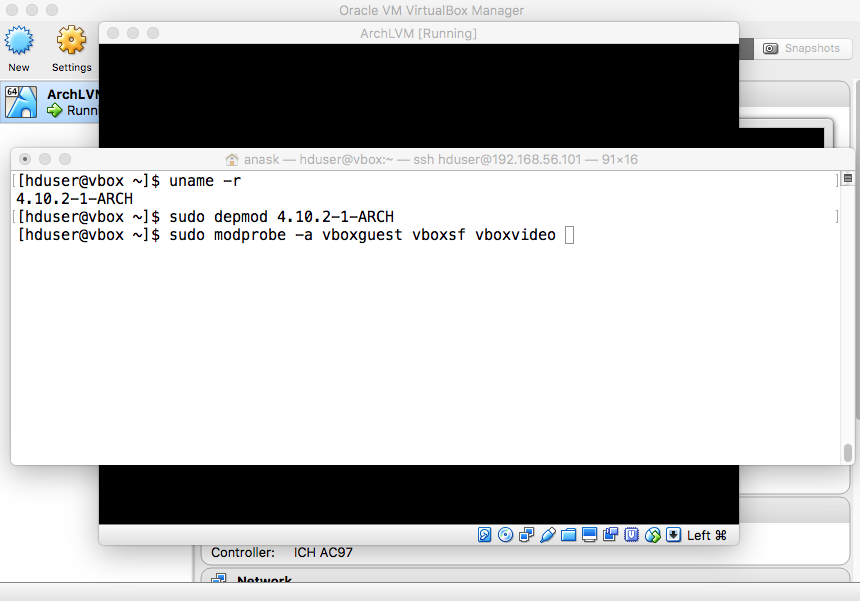
"sudo depmod KERNEL_RELEASE" "sudo modprobe -a vboxguest vboxsf vboxvideo". |
- Java

|
- Shared Folder
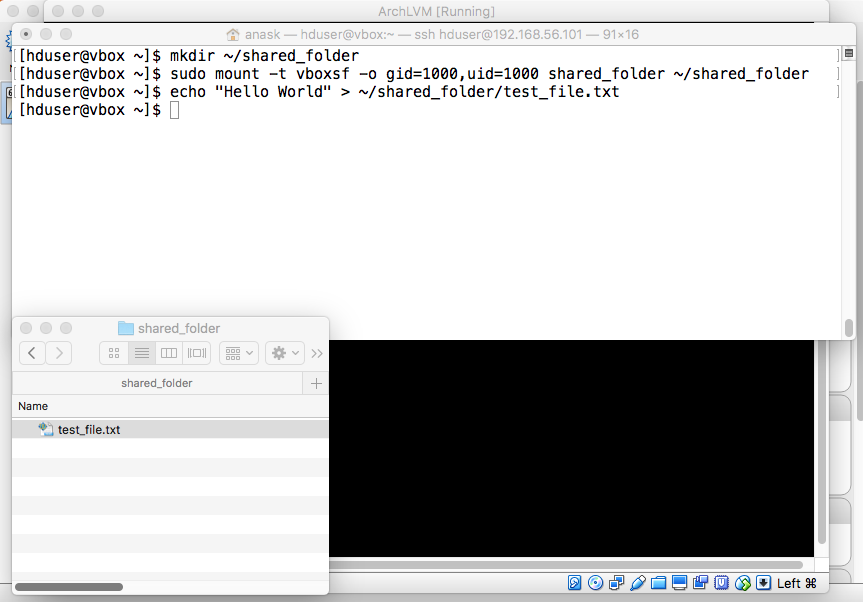
"mkdir ~/shared_folder" "sudo mount -t vboxsf -o gid=1000,uid=1000 shared_folder ~/shared_folder" If successful, executing the following command will create a file that is viewable from both the guest and host machines: "echo 'Hello World' > ~/shared_folder/test_file.txt". |
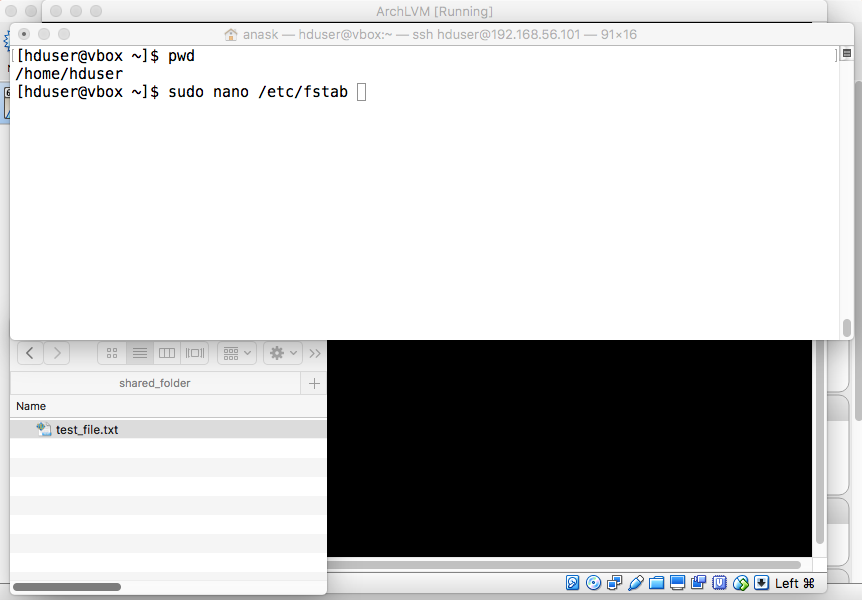
entry to /etc/fstab. Type "sudo nano /etc/fstab" and press enter. |
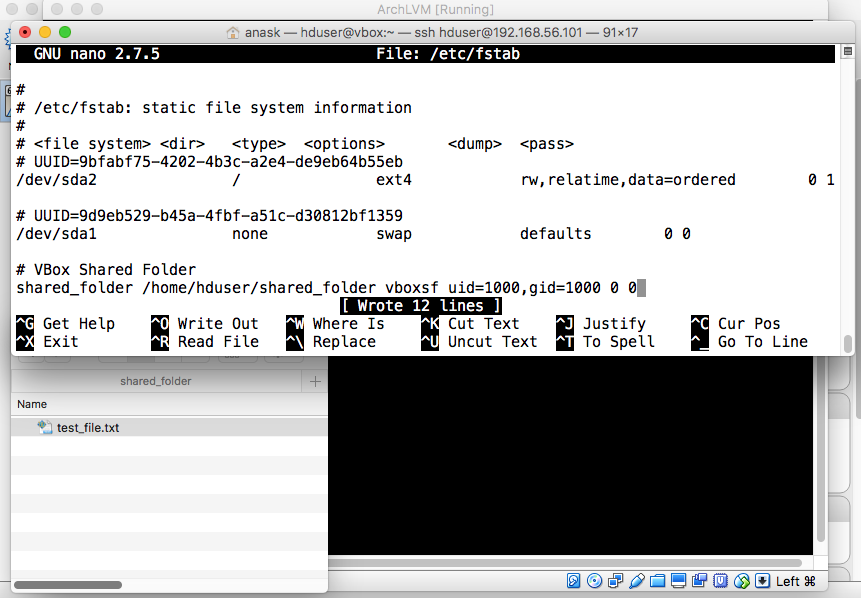
|

- Unix-based host: "VBoxManage setextradata VM_NAME VBoxInternal2/SharedFoldersEnableSymlinksCreate/SHARED_FOLDER_NAME 1" - Windows host: "VBoxManage.exe setextradata VM_NAME VBoxInternal2/SharedFoldersEnableSymlinksCreate/SHARED_FOLDER_NAME 1" |
In this section, we are going to download the Hadoop binaries to configure HDFS. For connivance, you can download the Hadoop files into the shared folder and edit them using a text editor with a GUI.
Get a download link for an HTTP mirror to download the binary tarball from hadoop.apache.org/releases.html or Hadoop 2.7.3.
Get a download link for an HTTP mirror to download the binary tarball from hadoop.apache.org/releases.html or Hadoop 2.7.3.
- Download Hadoop Binaries
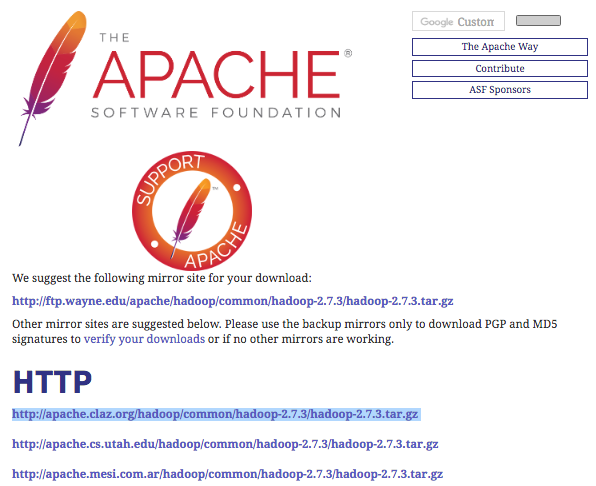
|
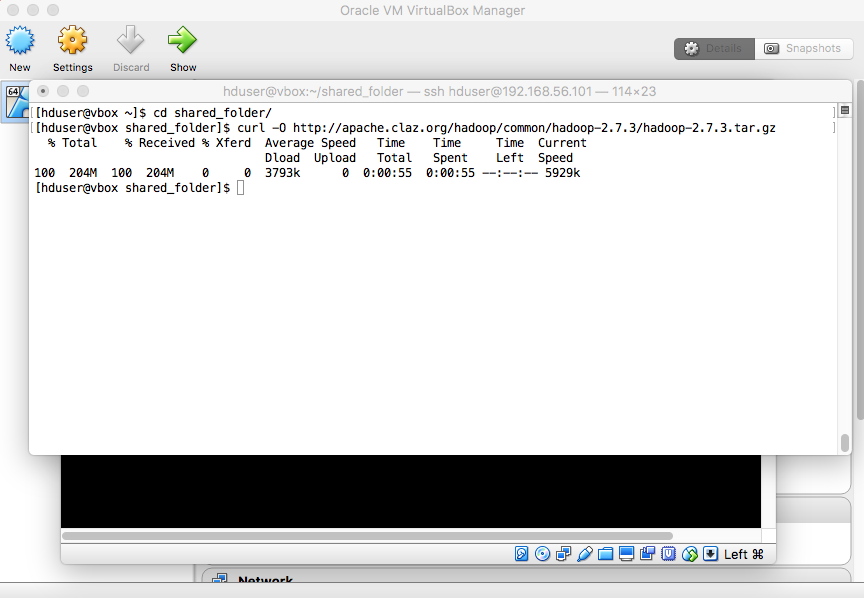
"curl -O http://apache.claz.org/hadoop/common/hadoop-2.7.3/hadoop-2.7.3.tar.gz" |
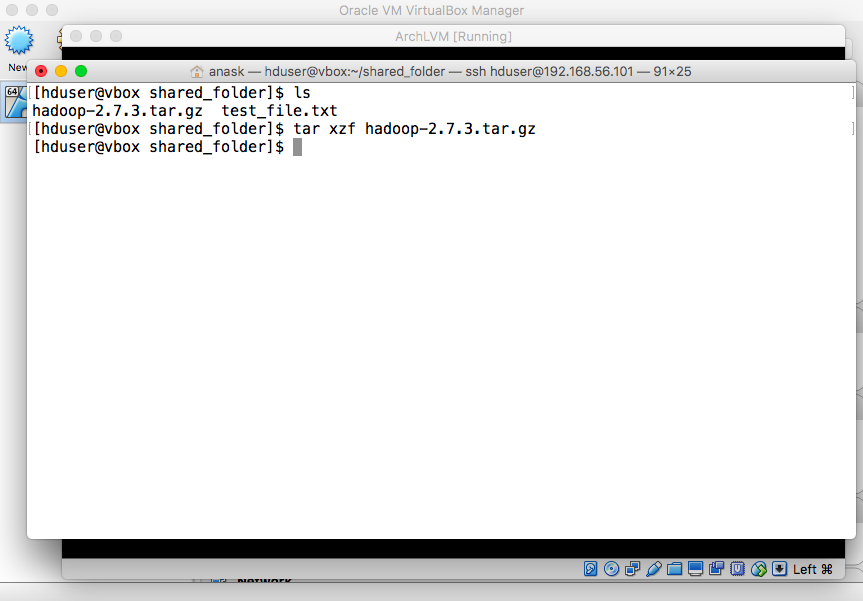
"tar xzf hadoop-2.7.3.tar.gz" |
- Pseudo-Distributed Configuration
Edit the following files and copy the corresponding content:
- core-site.xml
|
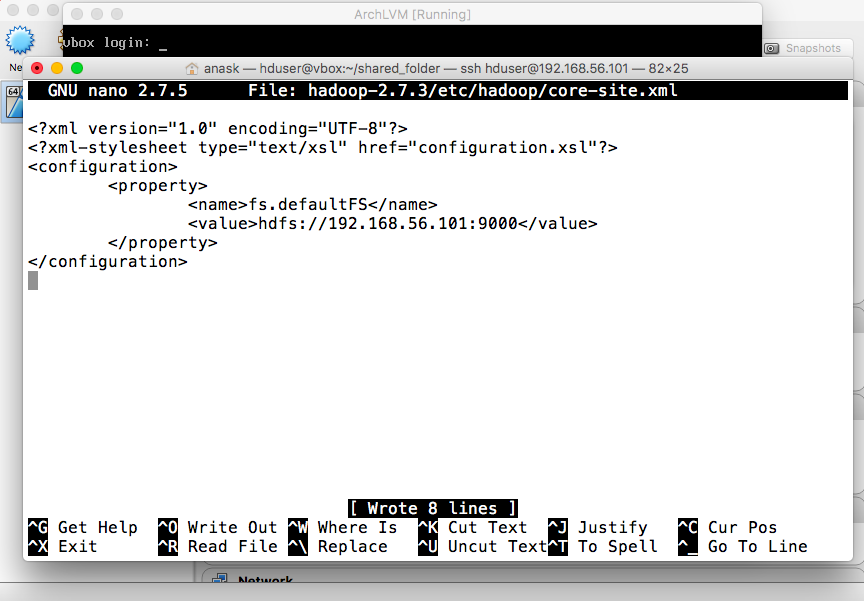
<configuration>
  <property>
    <name>fs.defaultFS</name>
    <value>hdfs://YOUR.IP.ADDRESS:9000</value>
  </property>
</configuration>
|
- yarn-site.xml
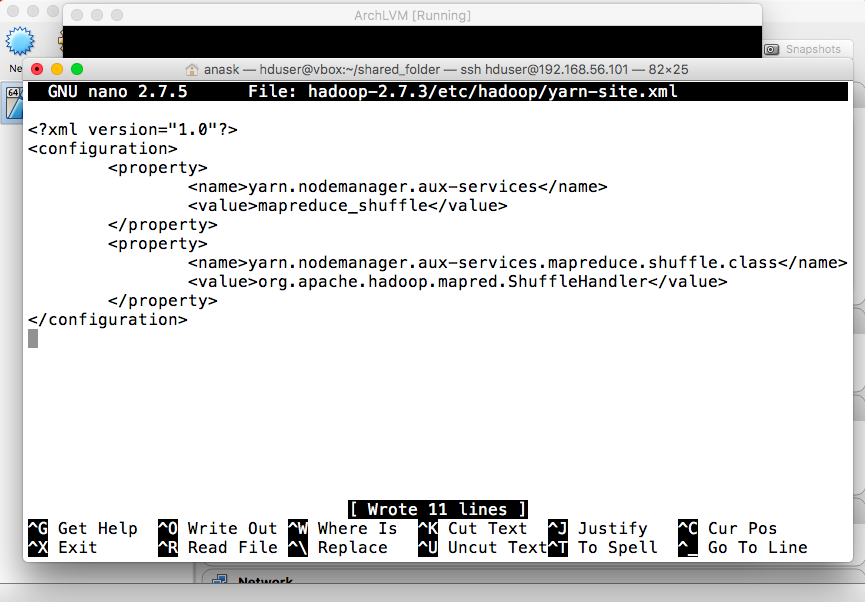
and press enter to edit the file. Enter the following configuration:
<configuration>
  <property>
    <name>yarn.nodemanager.aux-services</name>
    <value>mapreduce_shuffle</value>
  </property>

  <property>
    <name>yarn.nodemanager.aux-services.mapreduce.shuffle.class</name>
    <value>org.apache.hadoop.mapred.ShuffleHandler</value>
  </property>
</configuration>
|
- mapred-site.xml
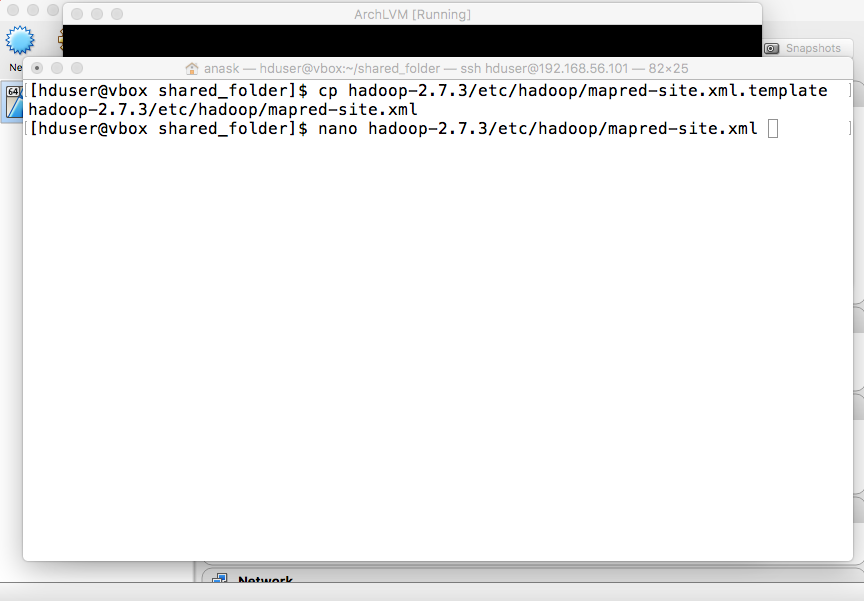
Copy template: "cp hadoop-2.7.3/etc/hadoop/mapred-site.xml.template hadoop-2.7.3/etc/hadoop/mapred-site.xml" Edit the file: "nano hadoop-2.7.3/etc/hadoop/mapred-site.xml" |
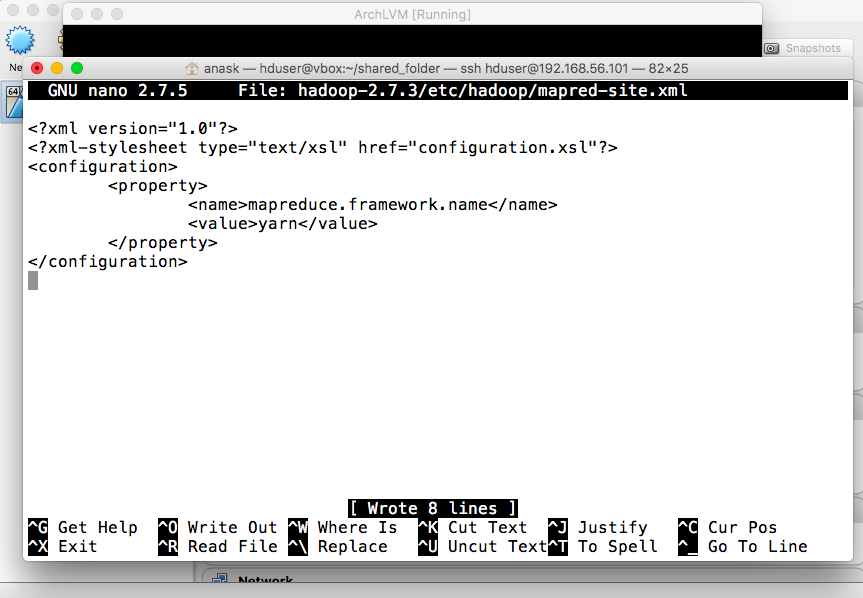
<configuration>
  <property>
    <name>mapreduce.framework.name</name>
    <value>yarn</value>
  </property>
</configuration>
|
- hdfs-site.xml
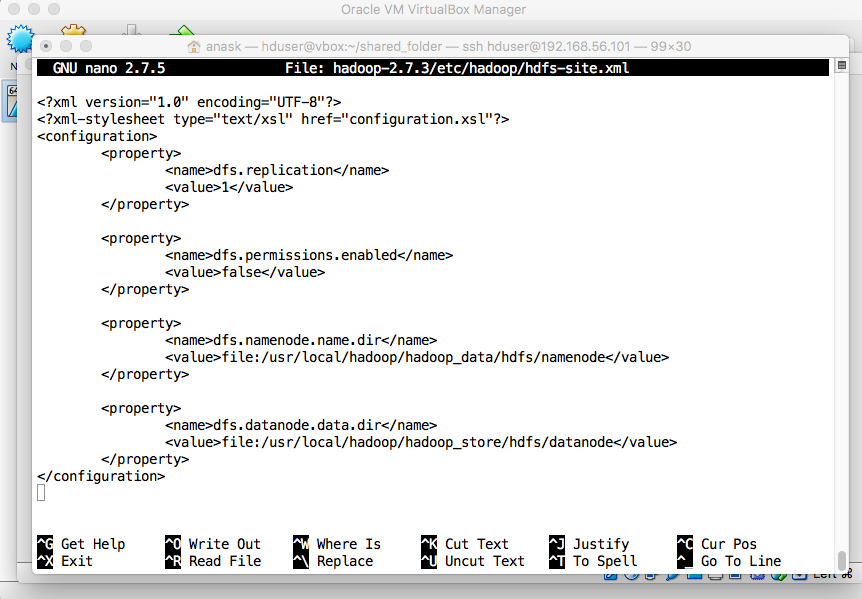
"nano hadoop-2.7.3/etc/hadoop/hdfs-site.xml" and enter the following configuration:
<configuration>
  <property>
    <name>dfs.replication</name>
    <value>1</value>
  </property>

  <property>
    <name>dfs.permissions.enabled</name>
    <value>false</value>
  </property>

  <property>
    <name>dfs.namenode.name.dir</name>
    <value>file:/usr/local/hadoop/hadoop_data/hdfs/namenode</value>
  </property>

  <property>
    <name>dfs.datanode.data.dir</name>
    <value>file:/usr/local/hadoop/hadoop_data/hdfs/datanode</value>
  </property>
</configuration>
|
- Hadoop Variables
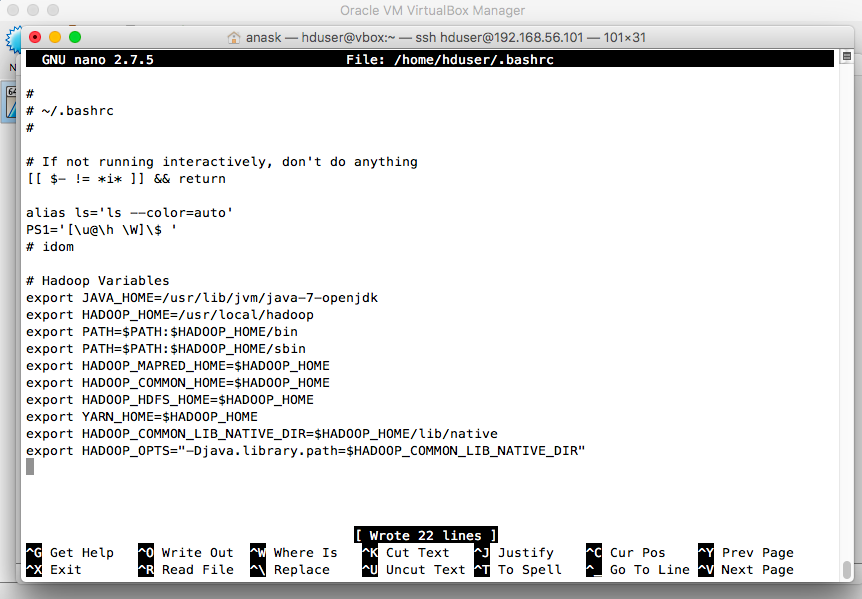
#Hadoop Variables export JAVA_HOME=/usr/lib/jvm/java-7-openjdk export HADOOP_HOME=/usr/local/hadoop export PATH=$PATH:$HADOOP_HOME/bin export PATH=$PATH:$HADOOP_HOME/sbin export HADOOP_MAPRED_HOME=$HADOOP_HOME export HADOOP_COMMON_HOME=$HADOOP_HOME export HADOOP_HDFS_HOME=$HADOOP_HOME export YARN_HOME=$HADOOP_HOME export HADOOP_COMMON_LIB_NATIVE_DIR=$HADOOP_HOME/lib/native export HADOOP_OPTS="-Djava.library.path=$HADOOP_COMMON_LIB_NATIVE_DIR" |
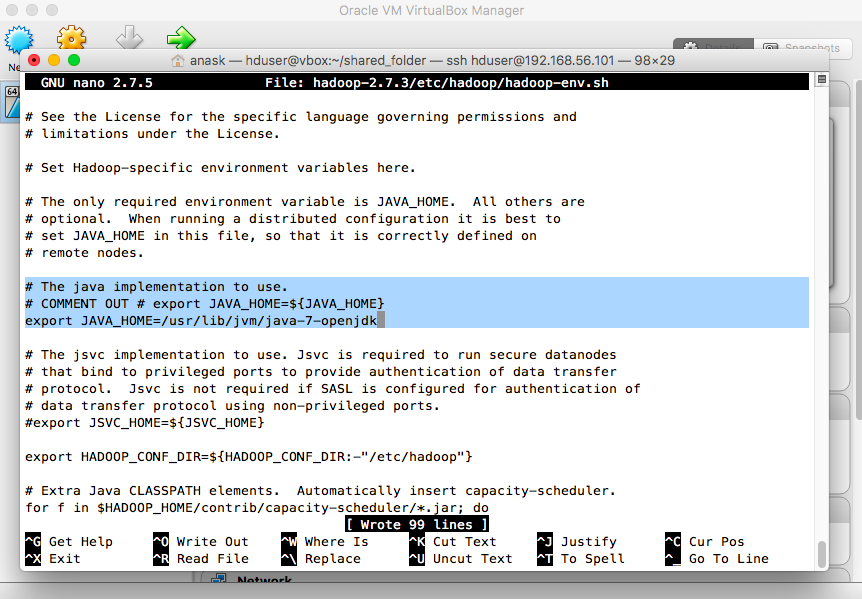
and modify the line that specifies the used Java implementation as follows: # The java implementation to use. export JAVA_HOME=/usr/lib/jvm/java-7-openjdk |
- Hadoop Directory
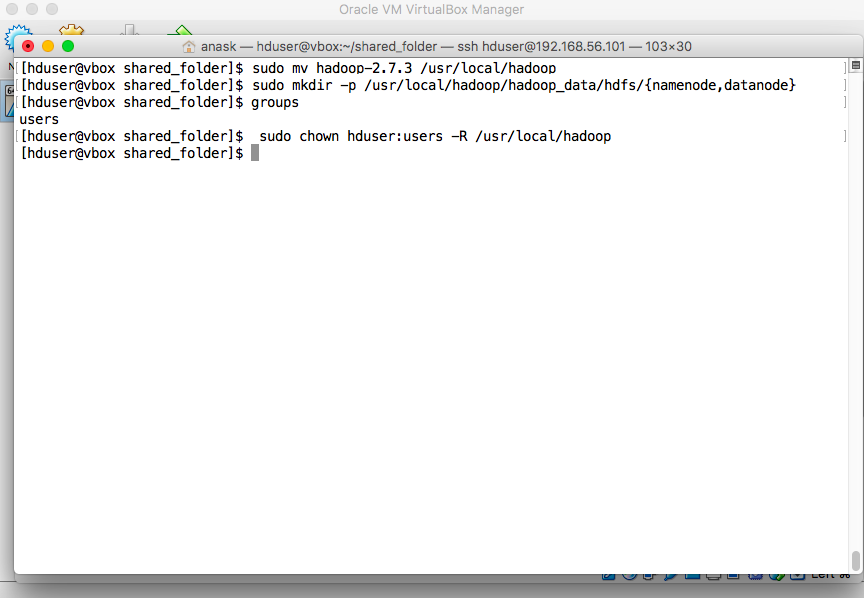
"sudo mv hadoop-2.7.3 /usr/local/hadoop" "sudo mkdir -p /usr/local/hadoop/hadoop_data/hdfs/{namenode,datanode}" "sudo chown hduser:users -R /usr/local/hadoop" |
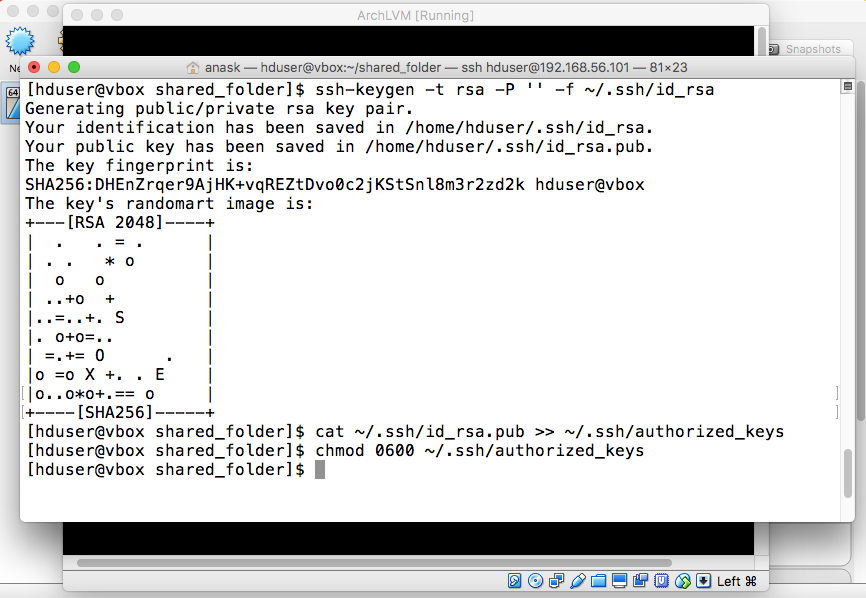
- Passphraseless SSH
"ssh-keygen -t rsa -P '' -f ~/.ssh/id_rsa" "cat ~/.ssh/id_rsa.pub >> ~/.ssh/authorized_keys" "chmod 0600 ~/.ssh/authorized_keys" |
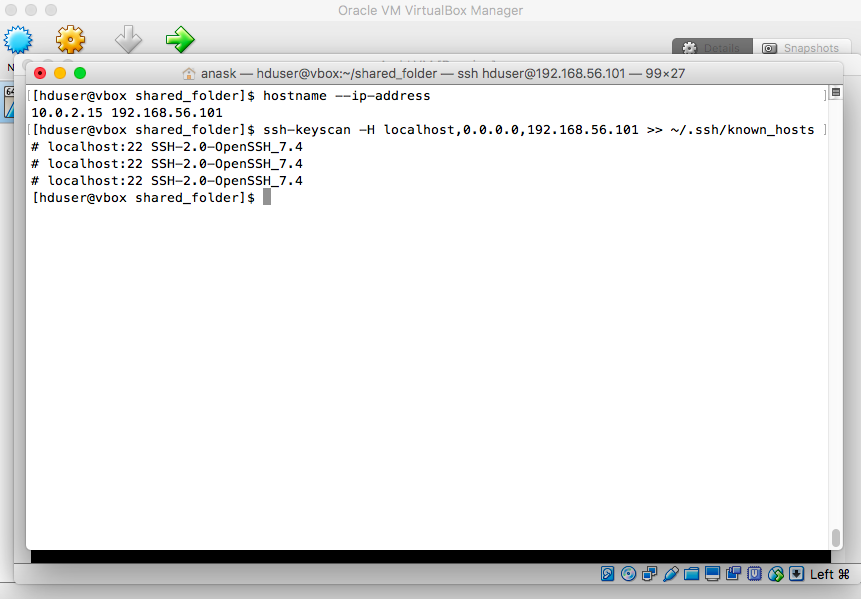
"ssh-keyscan -H localhost,0.0.0.0,YOUR_IP_ADDRESS >> ~/.ssh/known_hosts" |
- Format HDFS
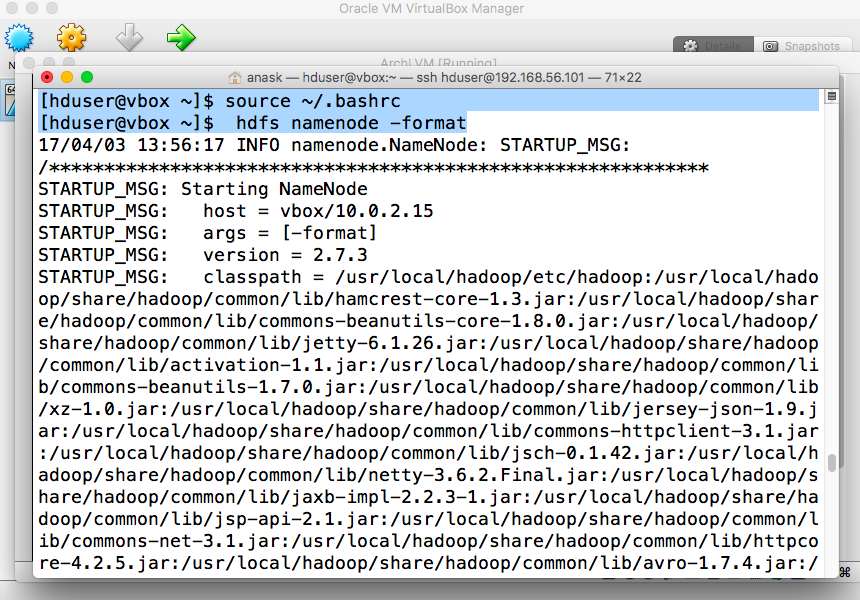
"source ~/.bashrc" "hdfs namenode -format" |
- Start HDFS and YARN
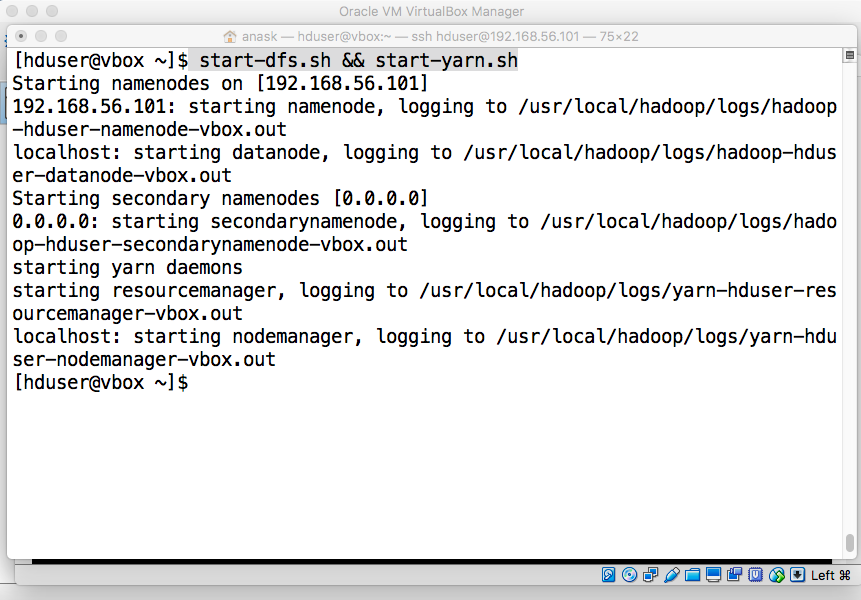
"start-dfs.sh && start-yarn.sh" |
- Checkout the Web UI for HDFS and YARN
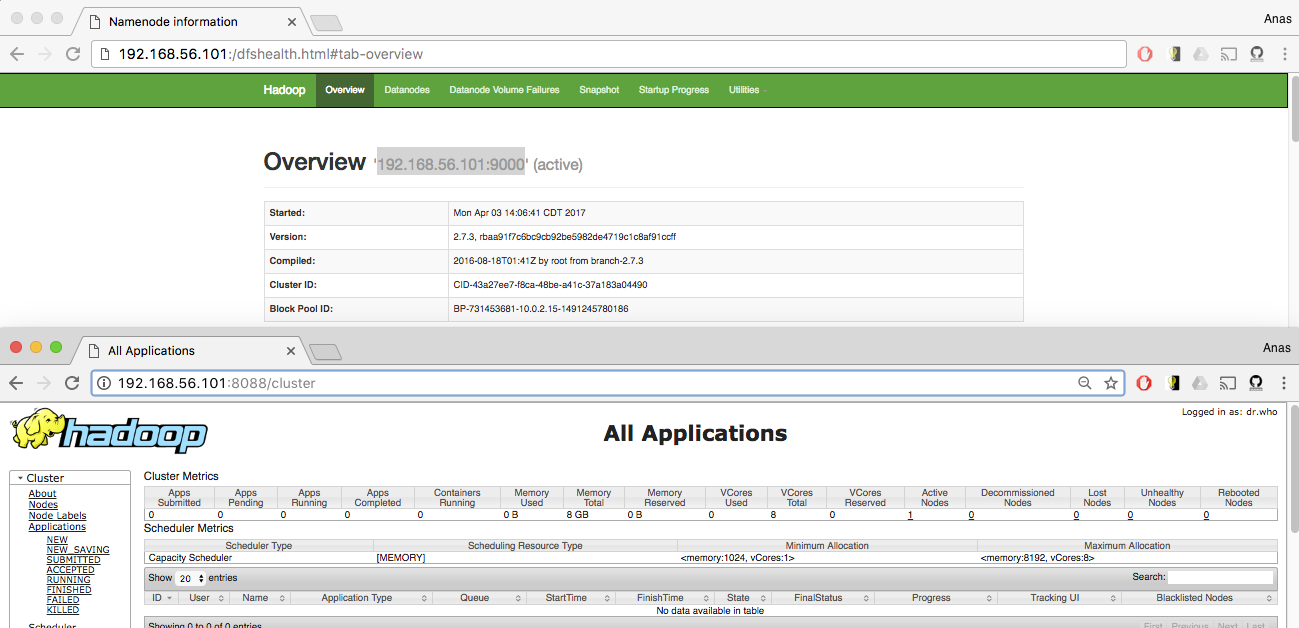
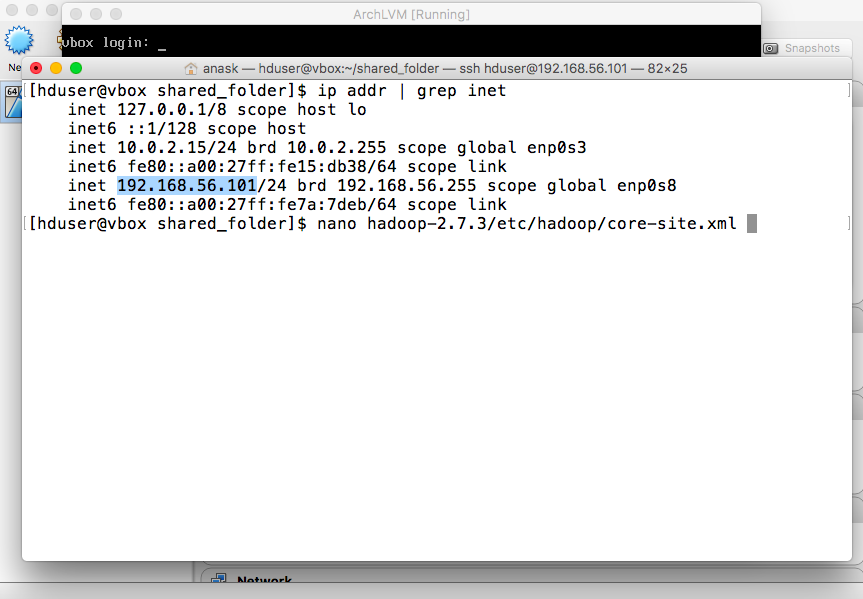
YOUR.IP.ADDRESS:50070 Yarn: YOUR.IP.ADDRESS:8088 NOTICE THE HDFS MASTER IS LISTENING ON PORT 9000 YOUR.IP.ADDRESS:9000 |
- Test HDFS
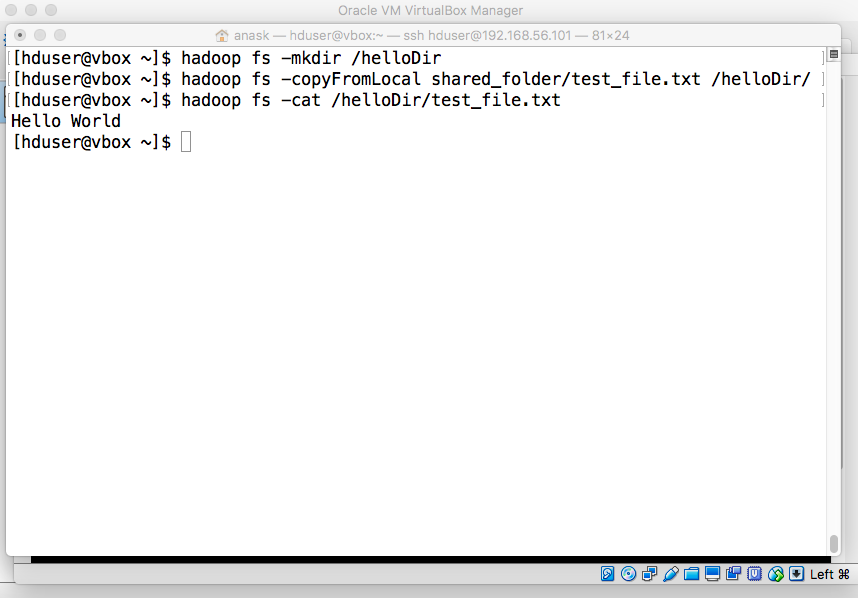
"hadoop fs -mkdir /helloDir" Copy a local file to the created directory: "hadoop fs -copyFromLocal shared_folder/test_file.txt /helloDir/" Print its content: "hadoop fs -cat /helloDir/test_file.txt" |
Sample Code:
import java.io.BufferedReader;
import java.io.IOException;
import java.io.InputStreamReader;
import org.apache.hadoop.conf.Configuration;
import org.apache.hadoop.fs.FileSystem;
import org.apache.hadoop.fs.Path;
import org.apache.log4j.Level;
import org.apache.log4j.Logger;

public class App {
  public static void main(String[] args) throws IOException {
    Logger.getRootLogger().setLevel(Level.OFF);

    Configuration config = new Configuration();
    config.set("fs.default.name", "hdfs://YOUR.IP.ADDRESS:9000/");

    Path inputFilePath = new Path("/helloDir/test_file.txt");
    FileSystem dfs = FileSystem.get(config);
    BufferedReader br = new BufferedReader(new InputStreamReader(dfs.open(inputFilePath)));
    String line;
    while ( (line = br.readLine()) != null) {
      System.out.println(line);
    }

    dfs.close();
  }
}
|
Use the following pom.xml to automatically download all of the requirements:
<?xml version="1.0" encoding="UTF-8"?>
<project xmlns="http://maven.apache.org/POM/4.0.0" xmlns:xsi="http://www.w3.org/2001/XMLSchema-instance" xsi:schemaLocation="http://maven.apache.org/POM/4.0.0 http://maven.apache.org/xsd/maven-4.0.0.xsd">
<modelVersion>4.0.0</modelVersion>
<groupId>edu.umkc.sce.csee.dbis.hadoop</groupId>
<artifactId>Hadoop</artifactId>
<version>0.0.1-SNAPSHOT</version>
<packaging>jar</packaging>
<name>Hadoop</name>
<url>http://maven.apache.org</url>
<properties>
<project.build.sourceEncoding>UTF-8</project.build.sourceEncoding>
</properties>
<dependencies>
<dependency>
<groupId>junit</groupId>
<artifactId>junit</artifactId>
<version>3.8.1</version>
<scope>test</scope>
</dependency>
<dependency>
<groupId>org.apache.hadoop</groupId>
<artifactId>hadoop-client</artifactId>
<version>2.7.3</version>
</dependency>
</dependencies>
</project>
- End
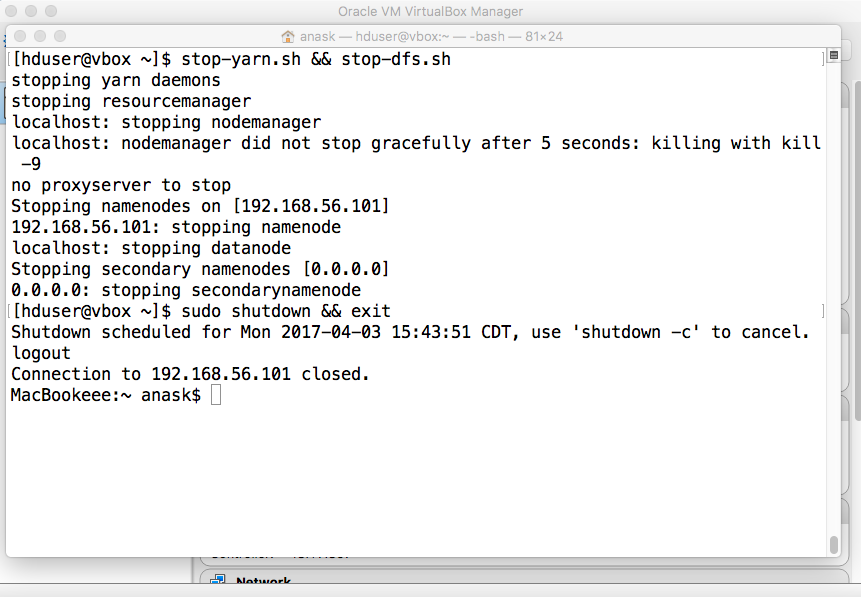
"stop-yarn.sh && stop-dfs.sh" Turn off the guest mashine and exit when done: "sudo shutdown && exit" The machine will be turned off in 60s. |
Can't create symlinks in virtualbox shared folders
Hadoop - MapReduce
HADOOP 2.7.0 SINGLE NODE CLUSTER SETUP ON UBUNTU 15.04
Hadoop: How to read a file from HDFS in Hadoop classes in Java
Hadoop: Setting up a Single Node Cluster. 1
Hadoop: Setting up a Single Node Cluster. 2
How to Install Arch Linux
Installation steps for Arch Linux guests
Running Hadoop on Ubuntu Linux (Single-Node Cluster)
Setting Up VirtualBox Shared Folders
VirtualBox: mount.vboxsf Question 28328775